Sumo Logic
Sumo Logic is a cloud-based platform that provides log management and analytics services. It helps organizations collect, analyze, and derive insights from their log data, offering visibility into application and infrastructure performance.
You must have an account in Sumo Logic.
1 Go to Dashboard > Marketplace > SSO Integrations.
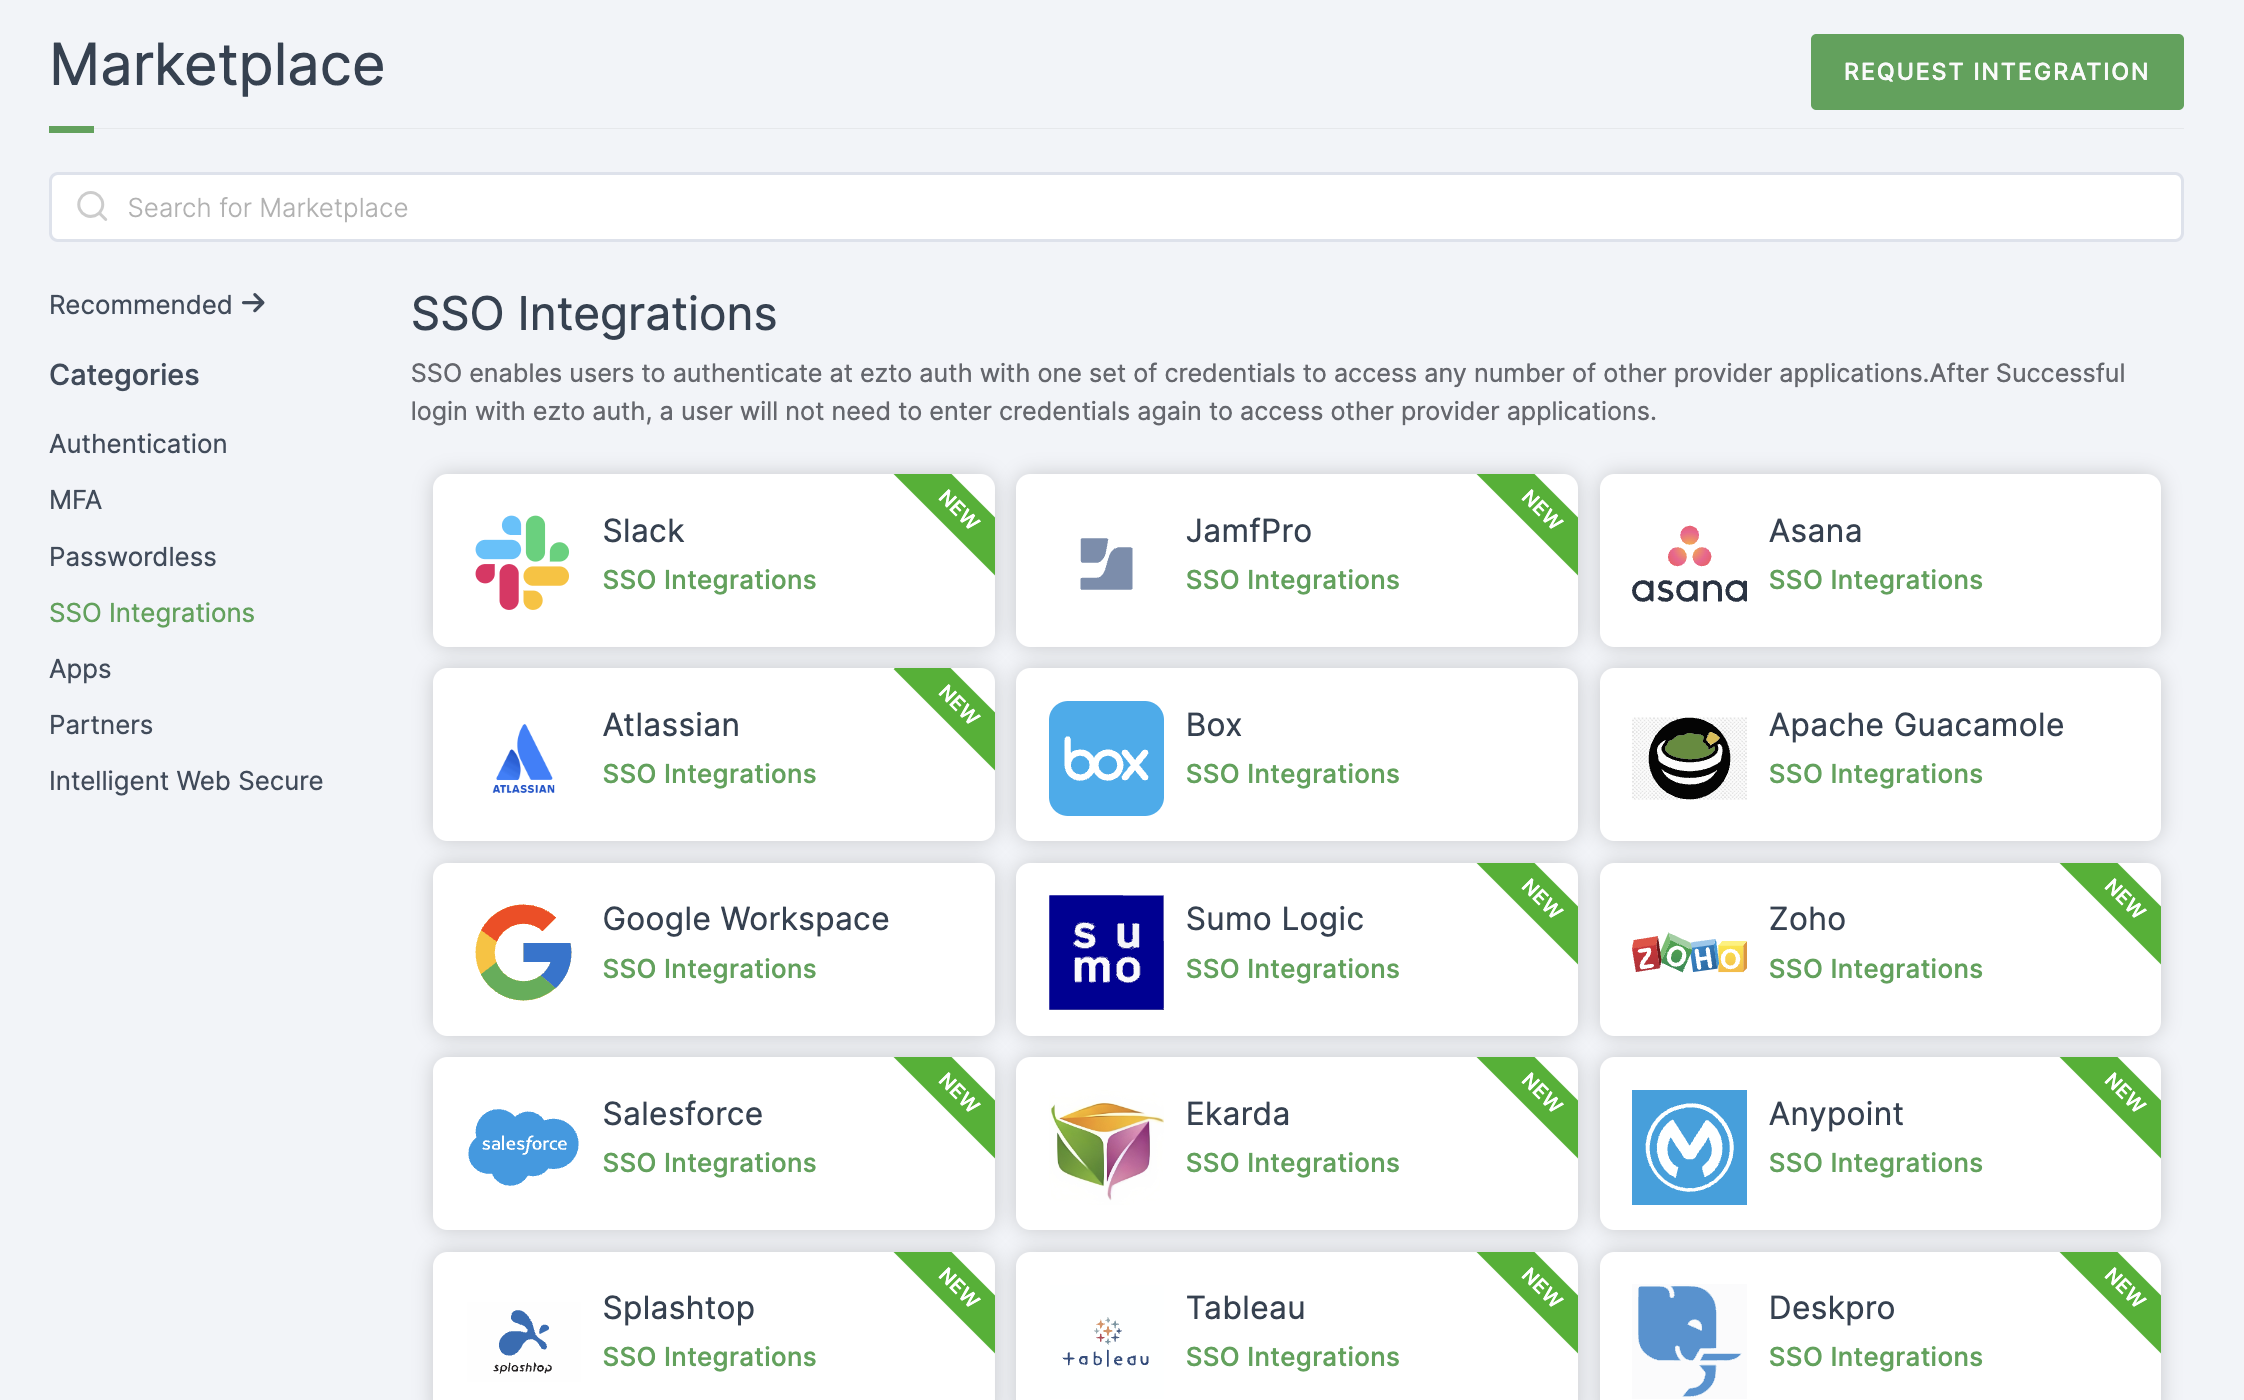
2 Select Sumo Logic from the list.
3 You'll land on the overview page, with an additional tab: Installation (providing a step-by-step installation guide).

4 Click on INSTALL.
5 Provide a descriptive Name.
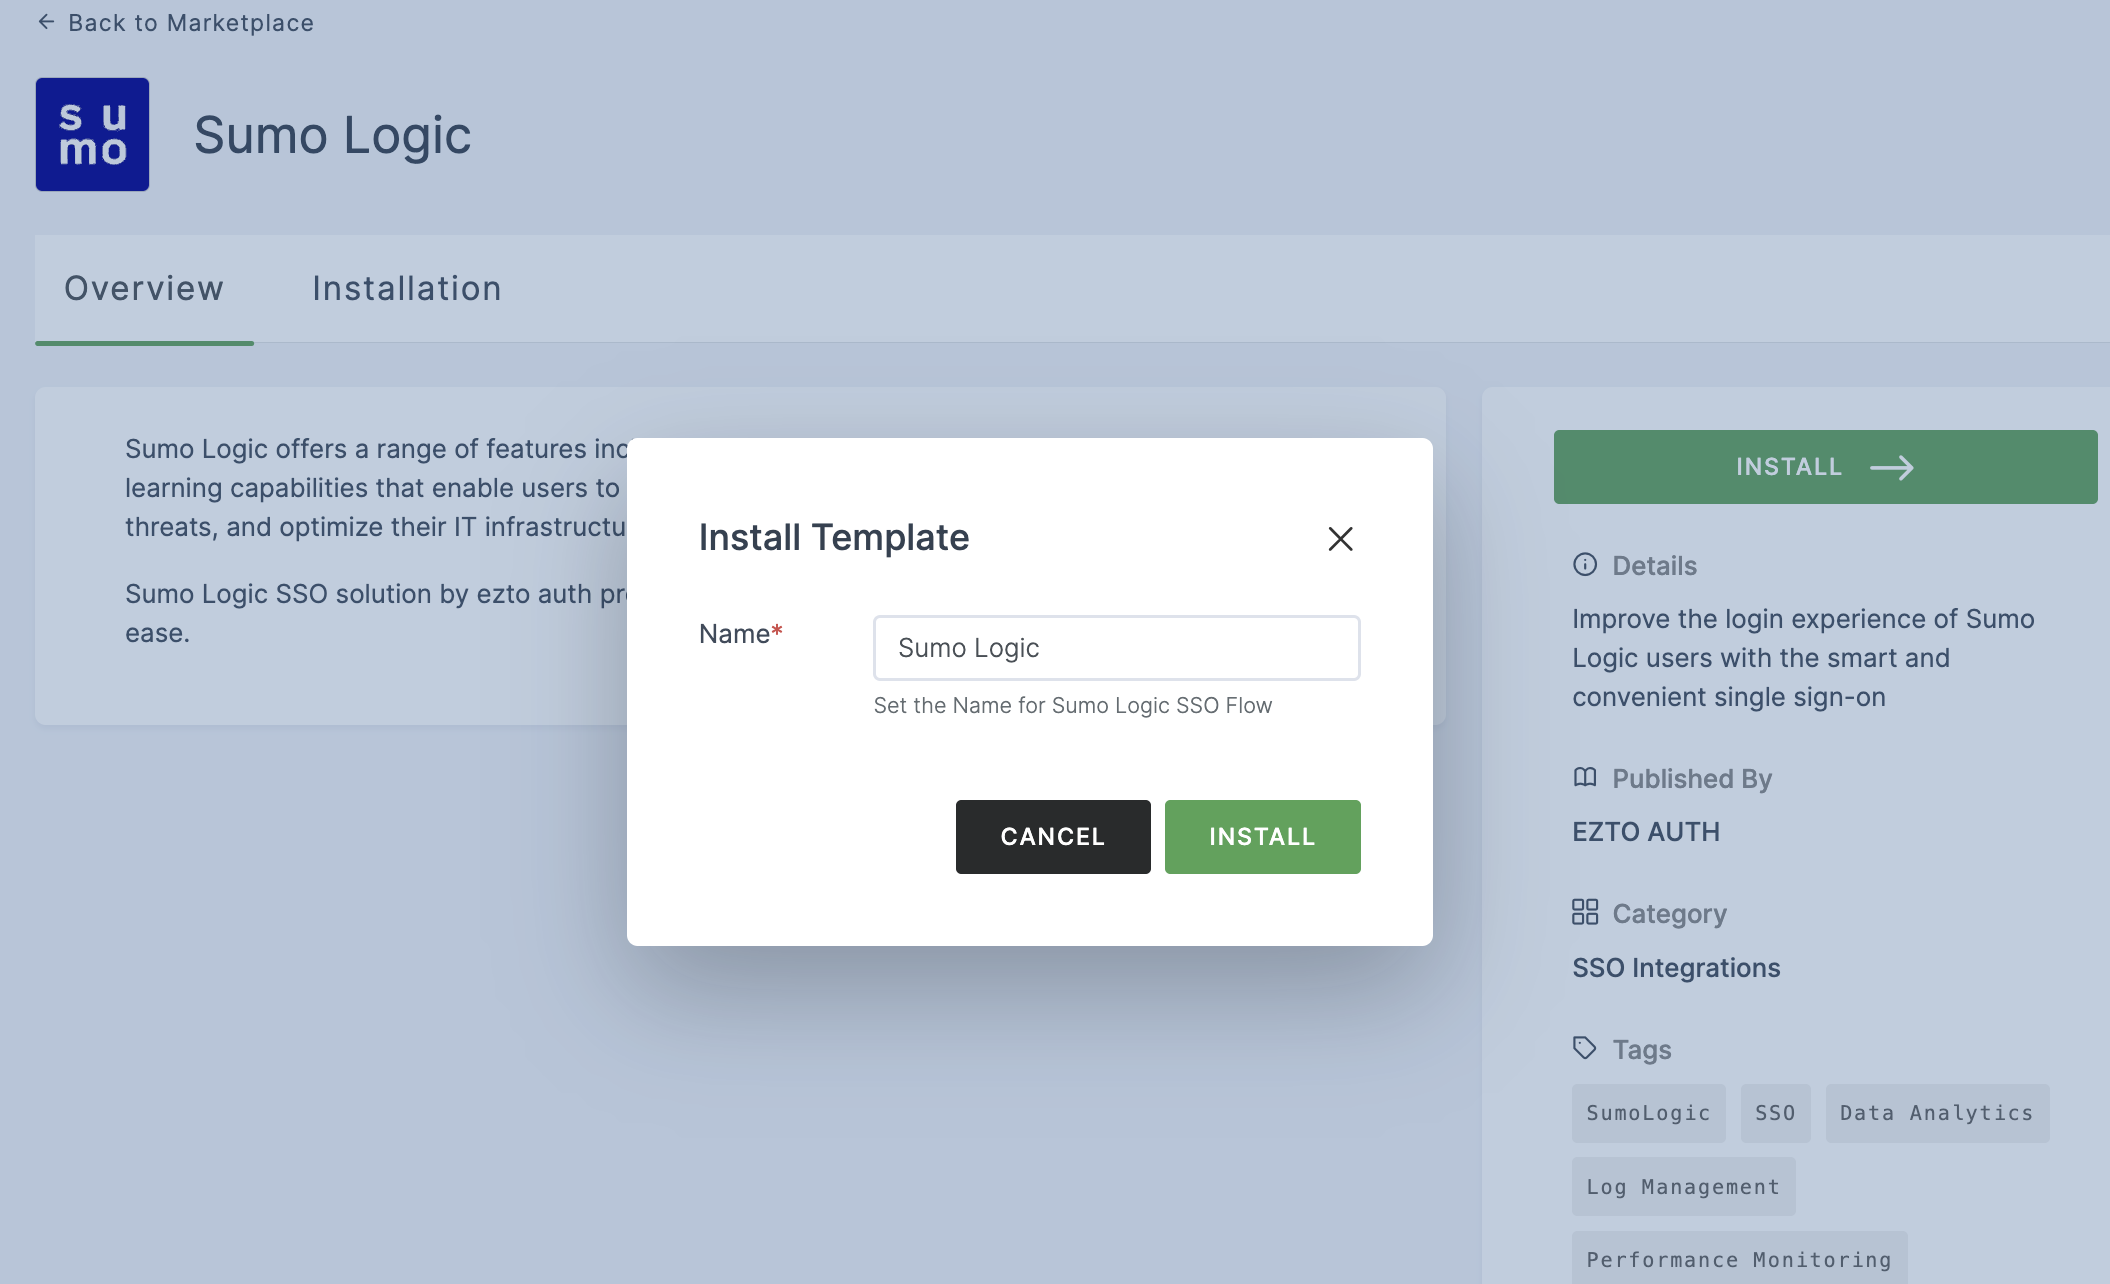
6 Click on INSTALL.
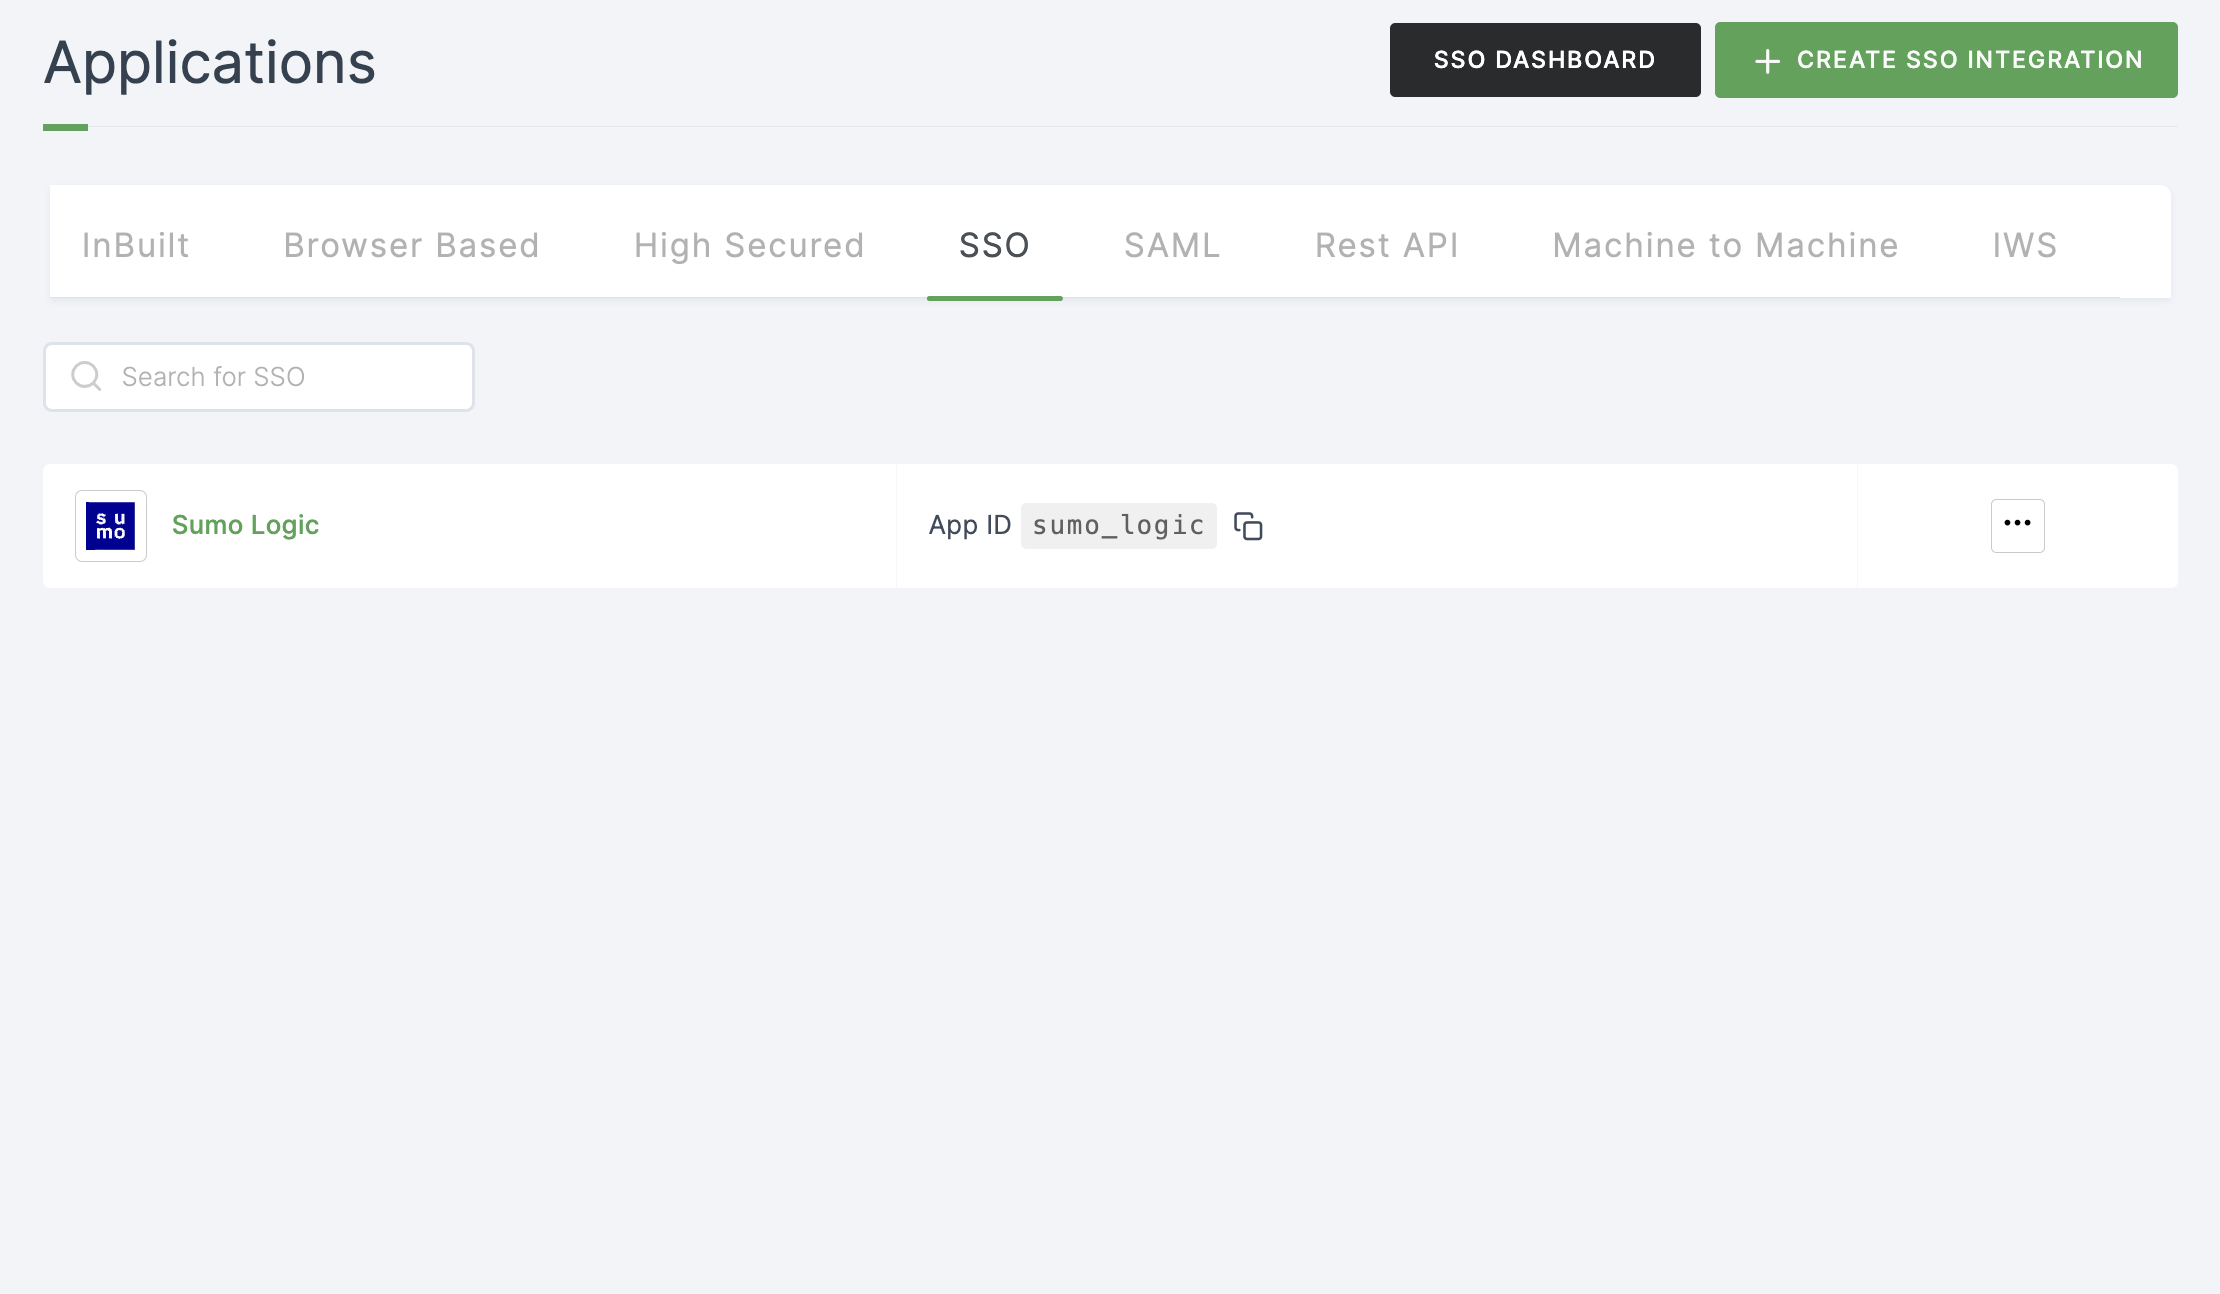
7 To enable Sumo Logic SSO login, go to Applications > SSO, and click on the created Sumo Logic SSO.
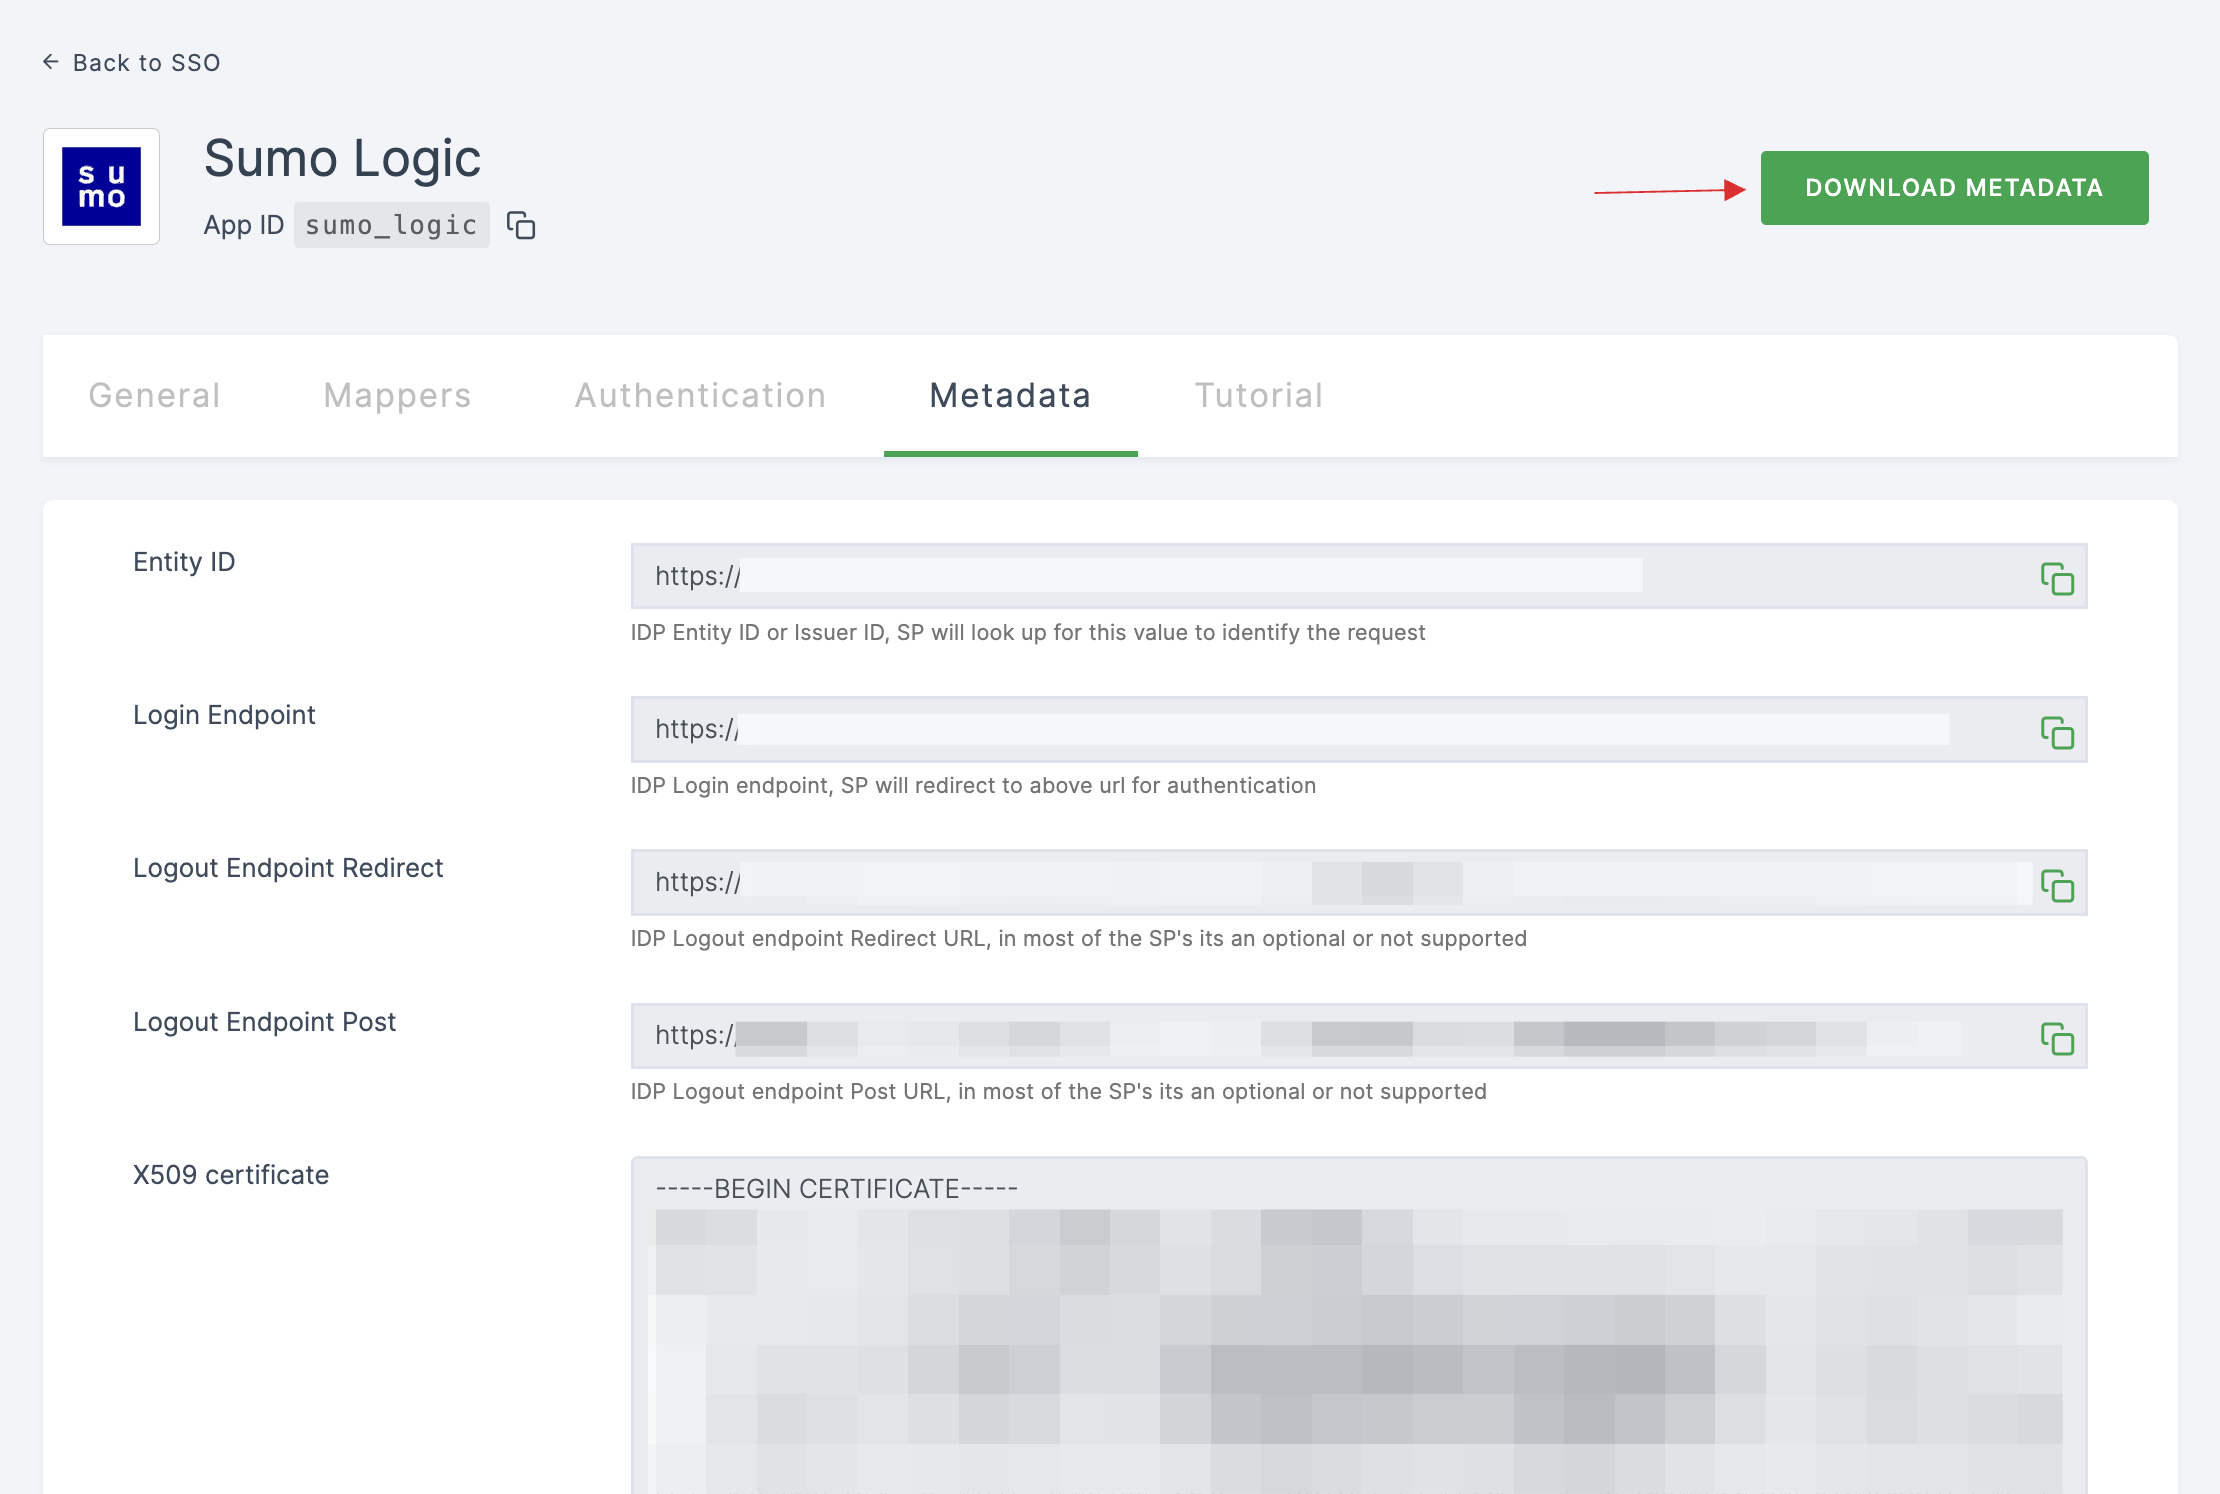
8 Click on Metadata, where the list of endpoints for the particular SSO will be available. Click on DOWNLOAD METADATA.
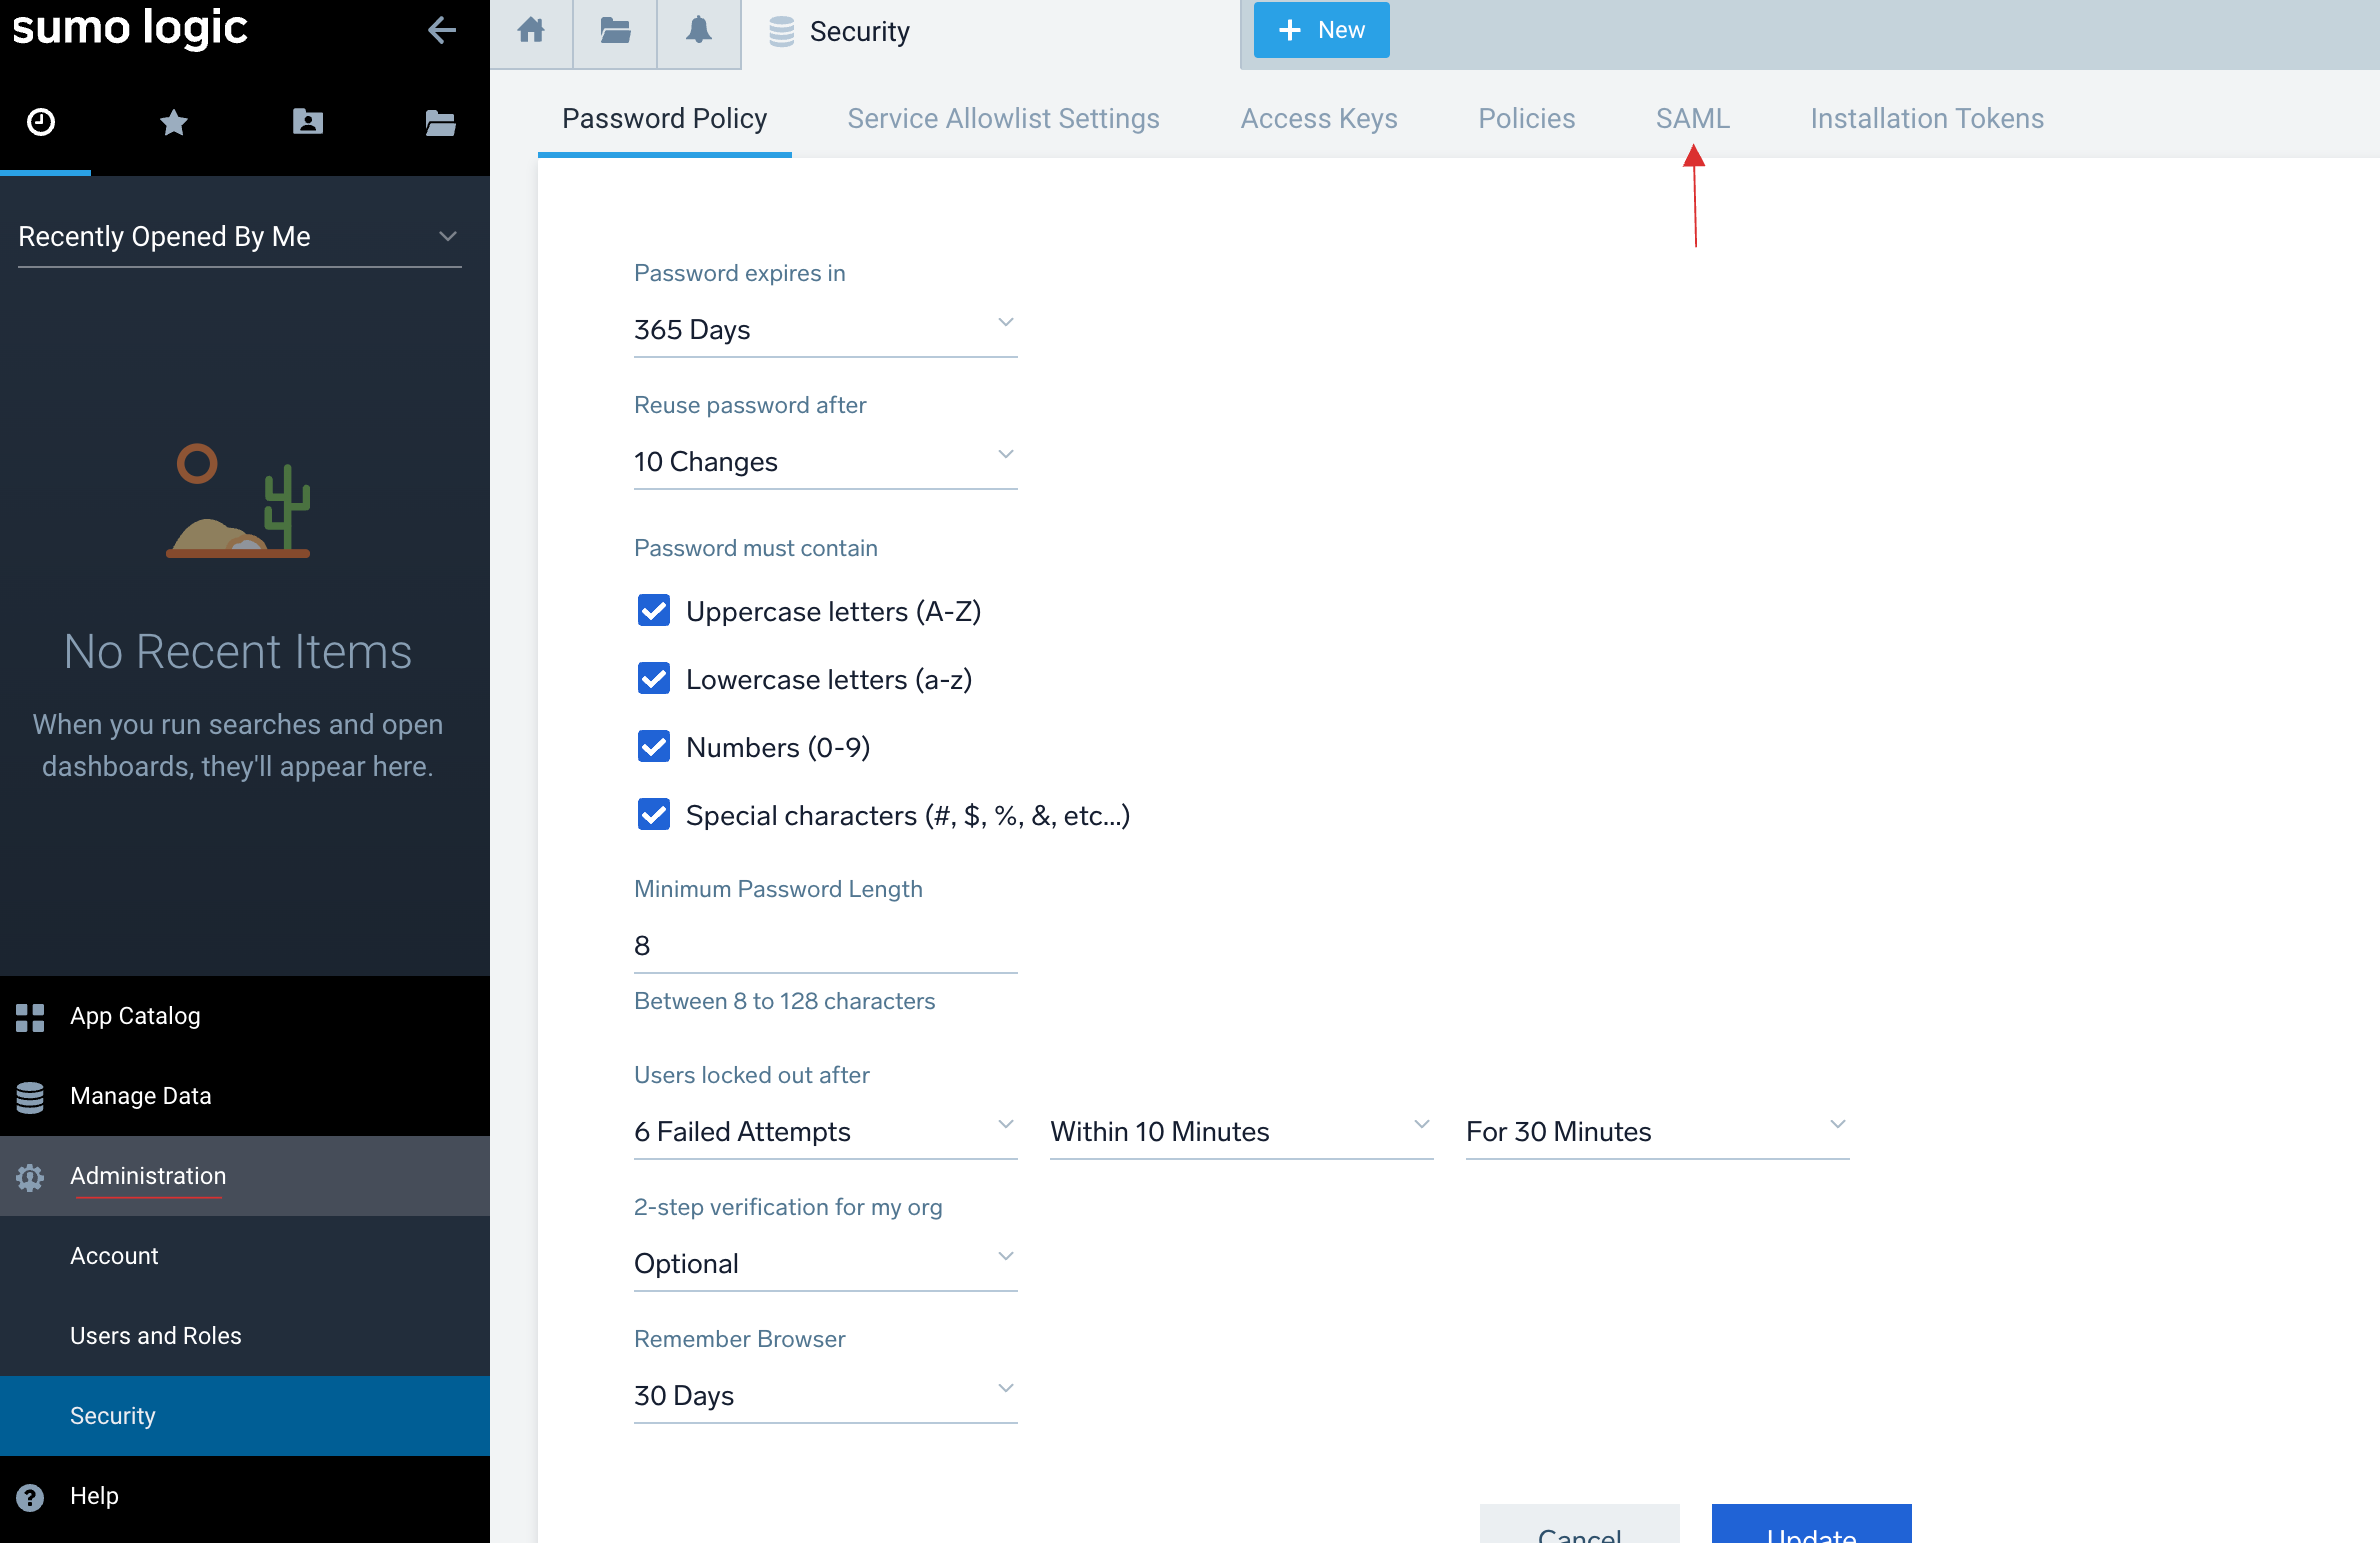
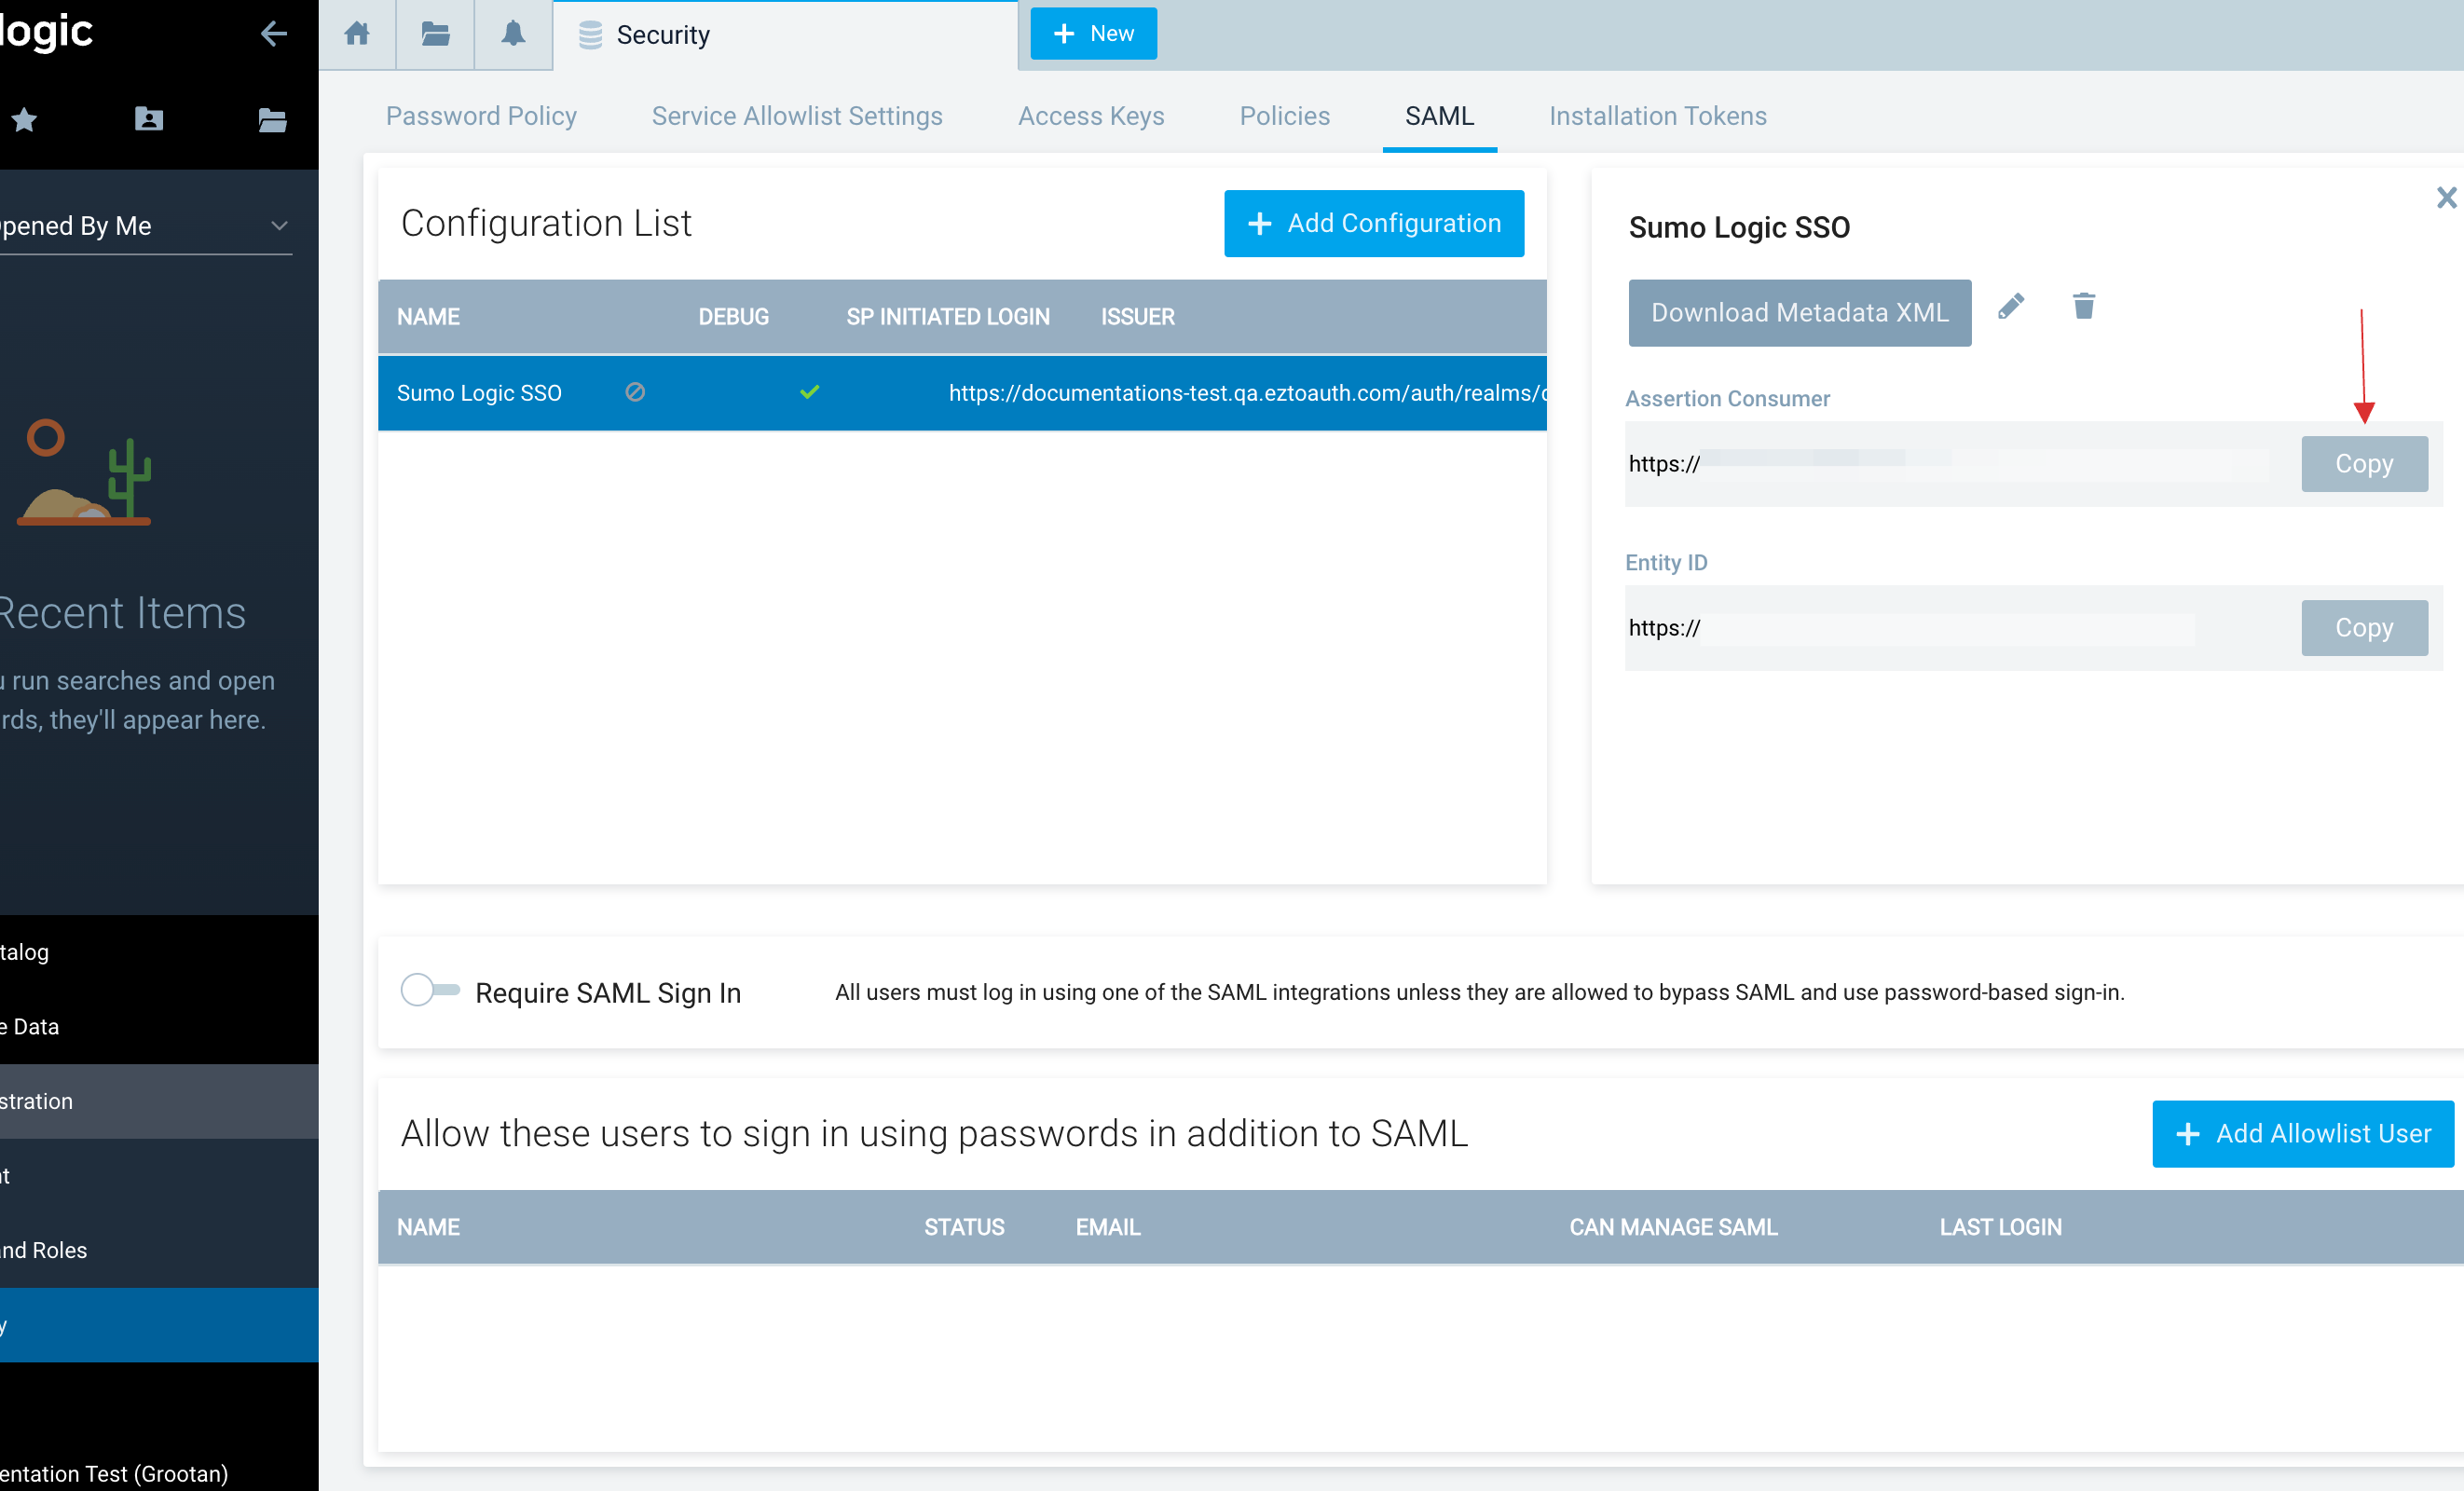
9 Navigate to Sumo Logic dashboard.
10 Click on Administration > Security, and click on the SAML tab.
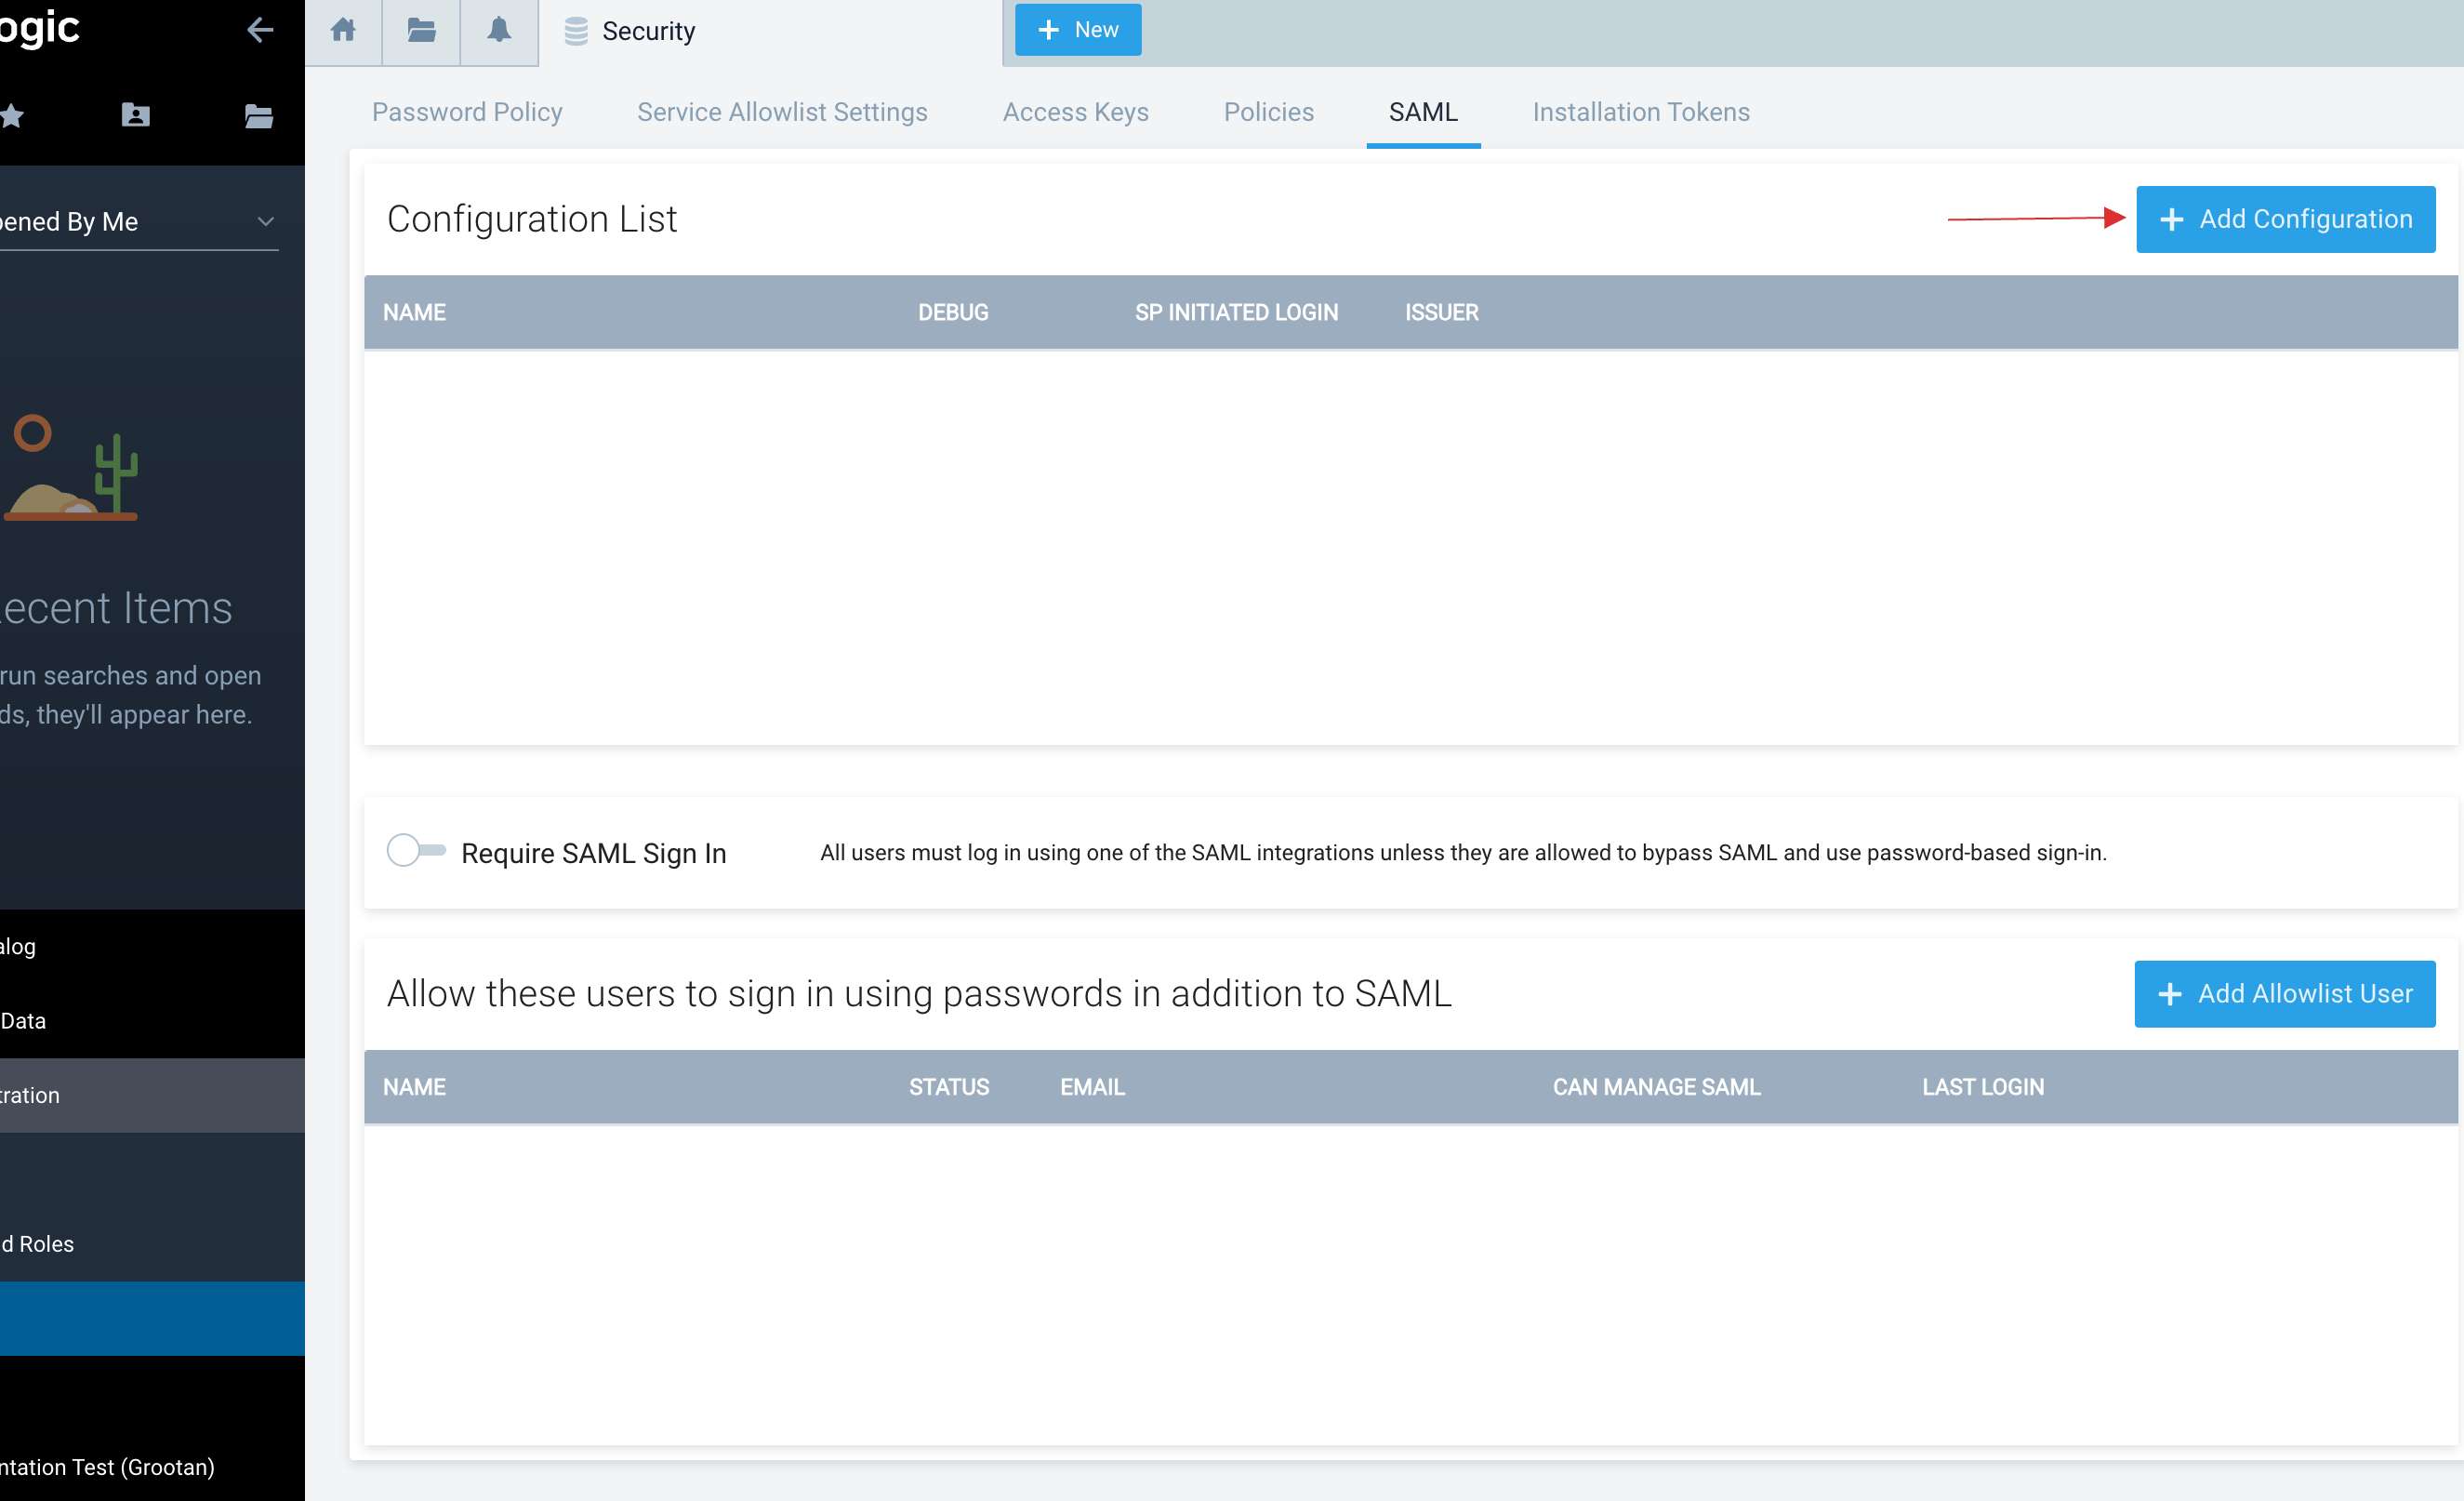
11 Click on Add Configuration.
12 The SAML Configuration will be displayed, click on Import Metadata XML.
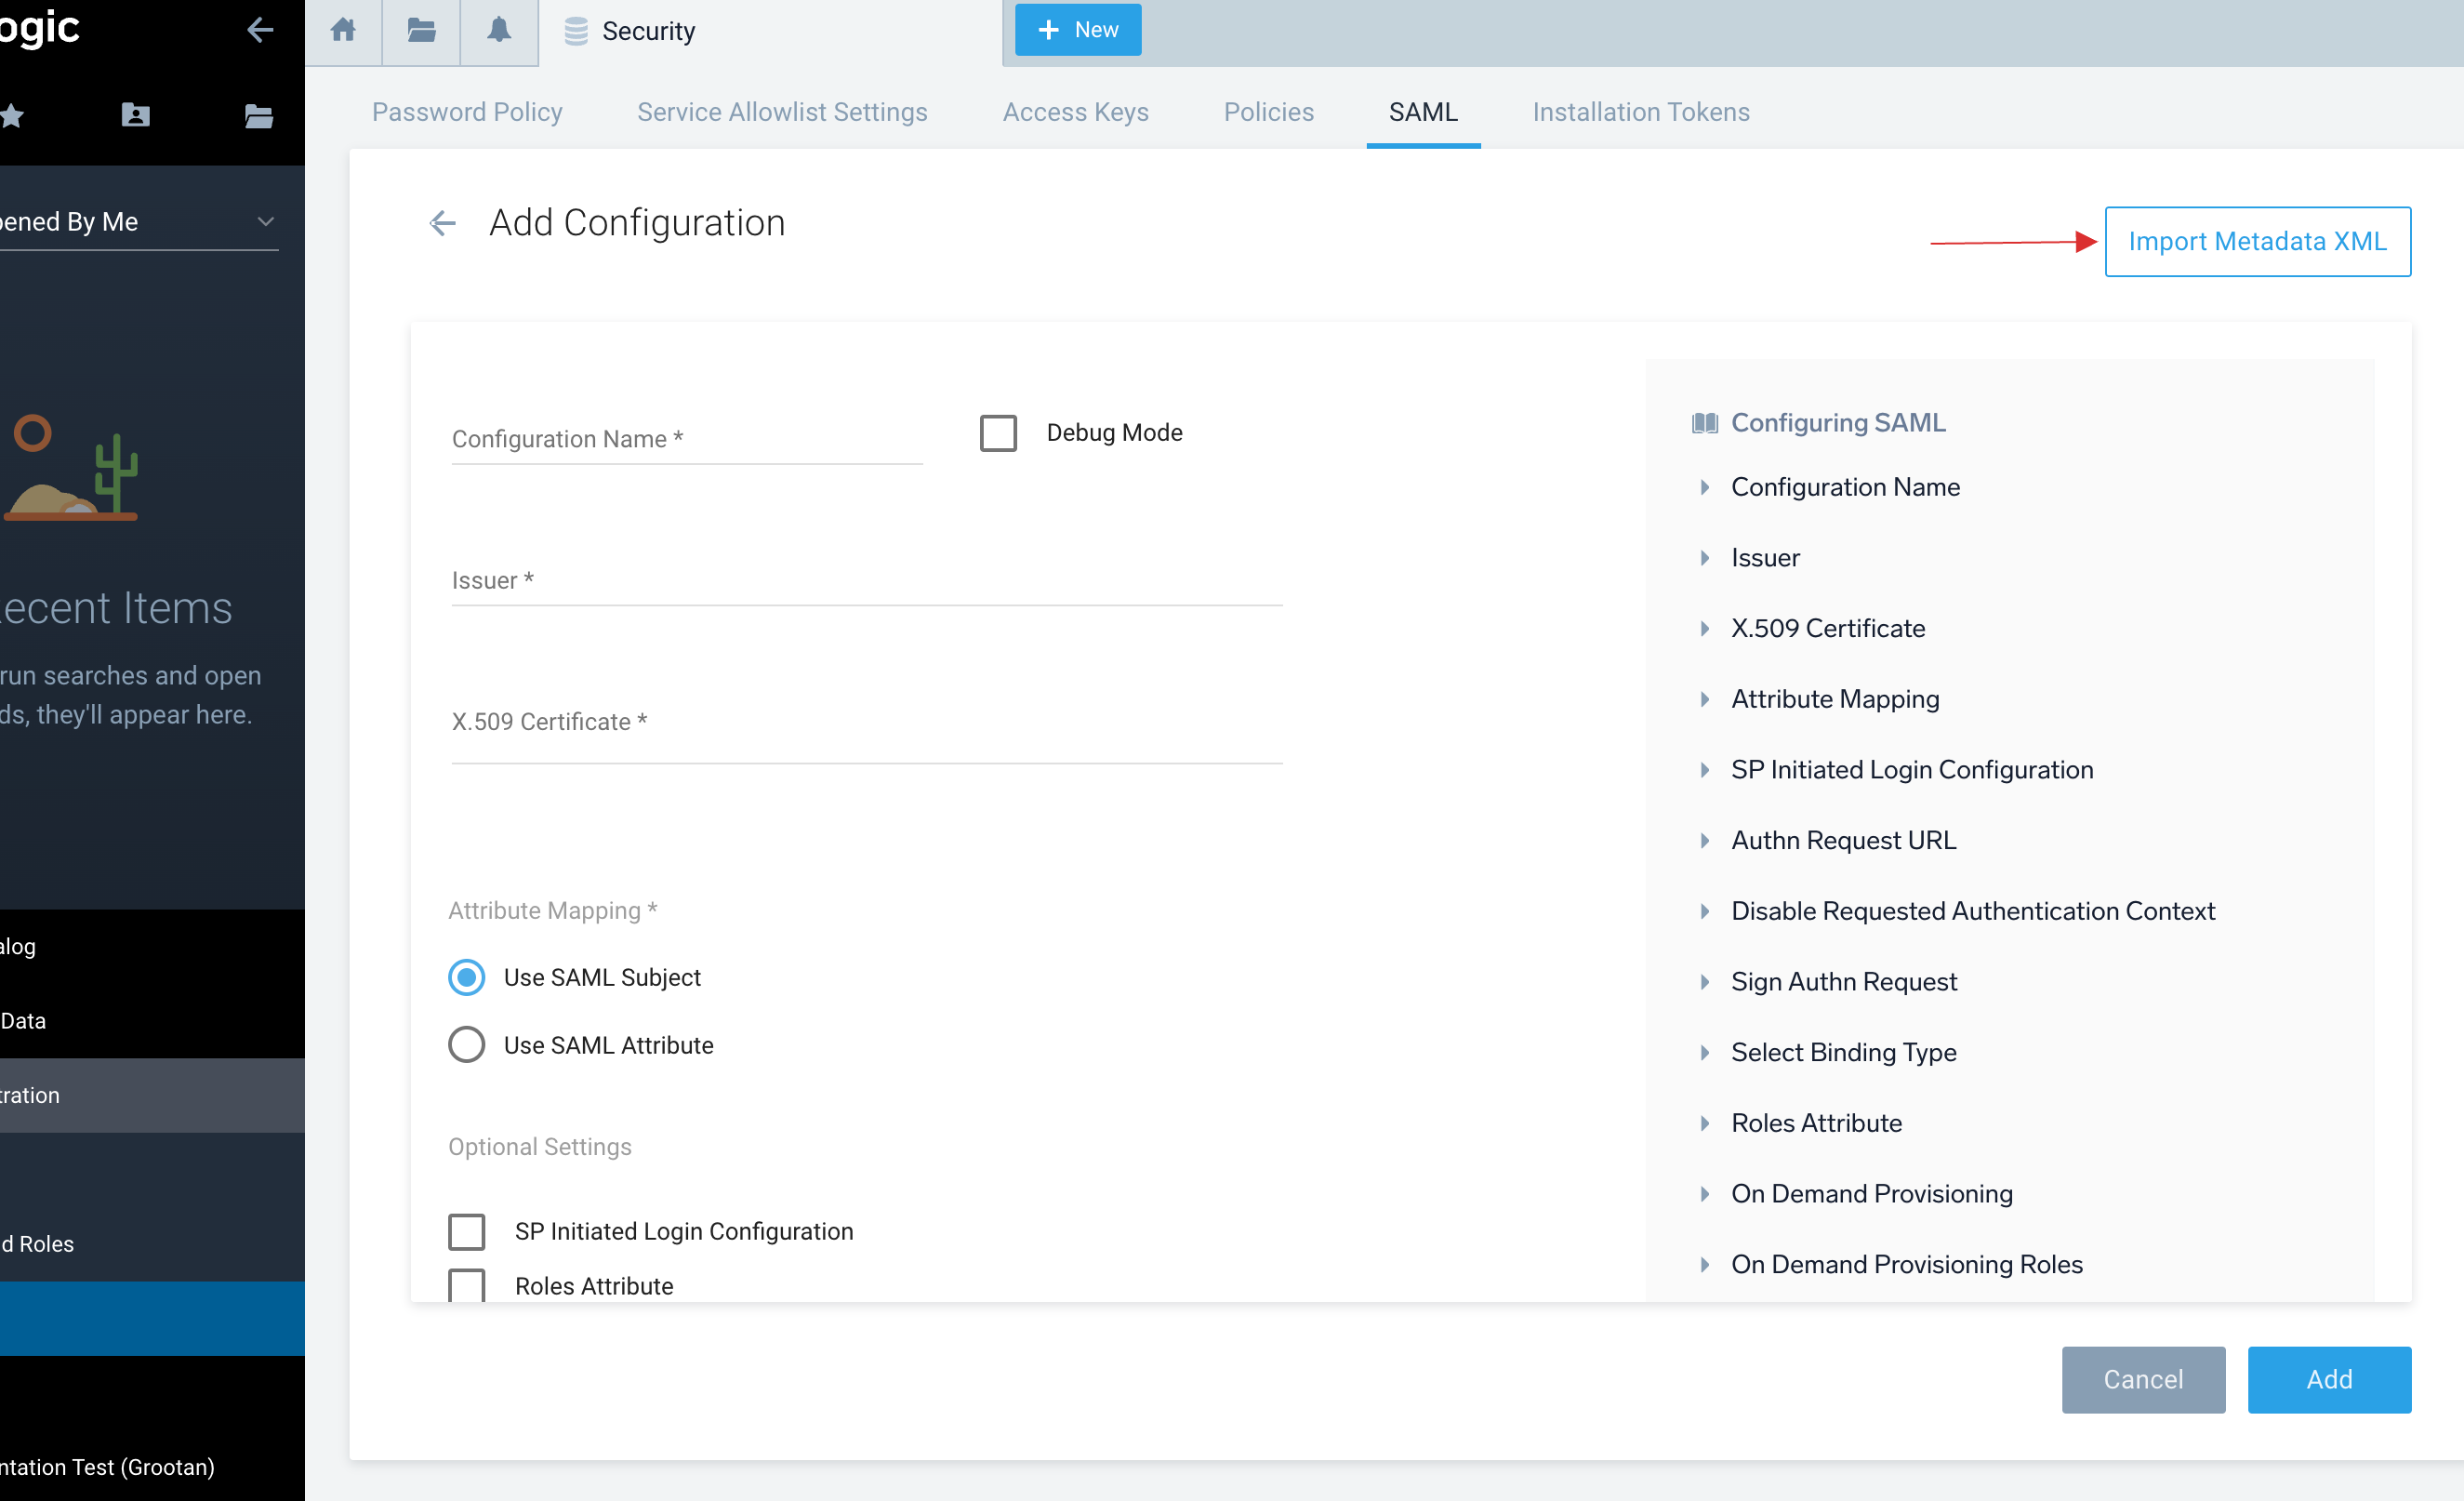
13 Click on Choose file and upload the downloaded Metadata XML file.
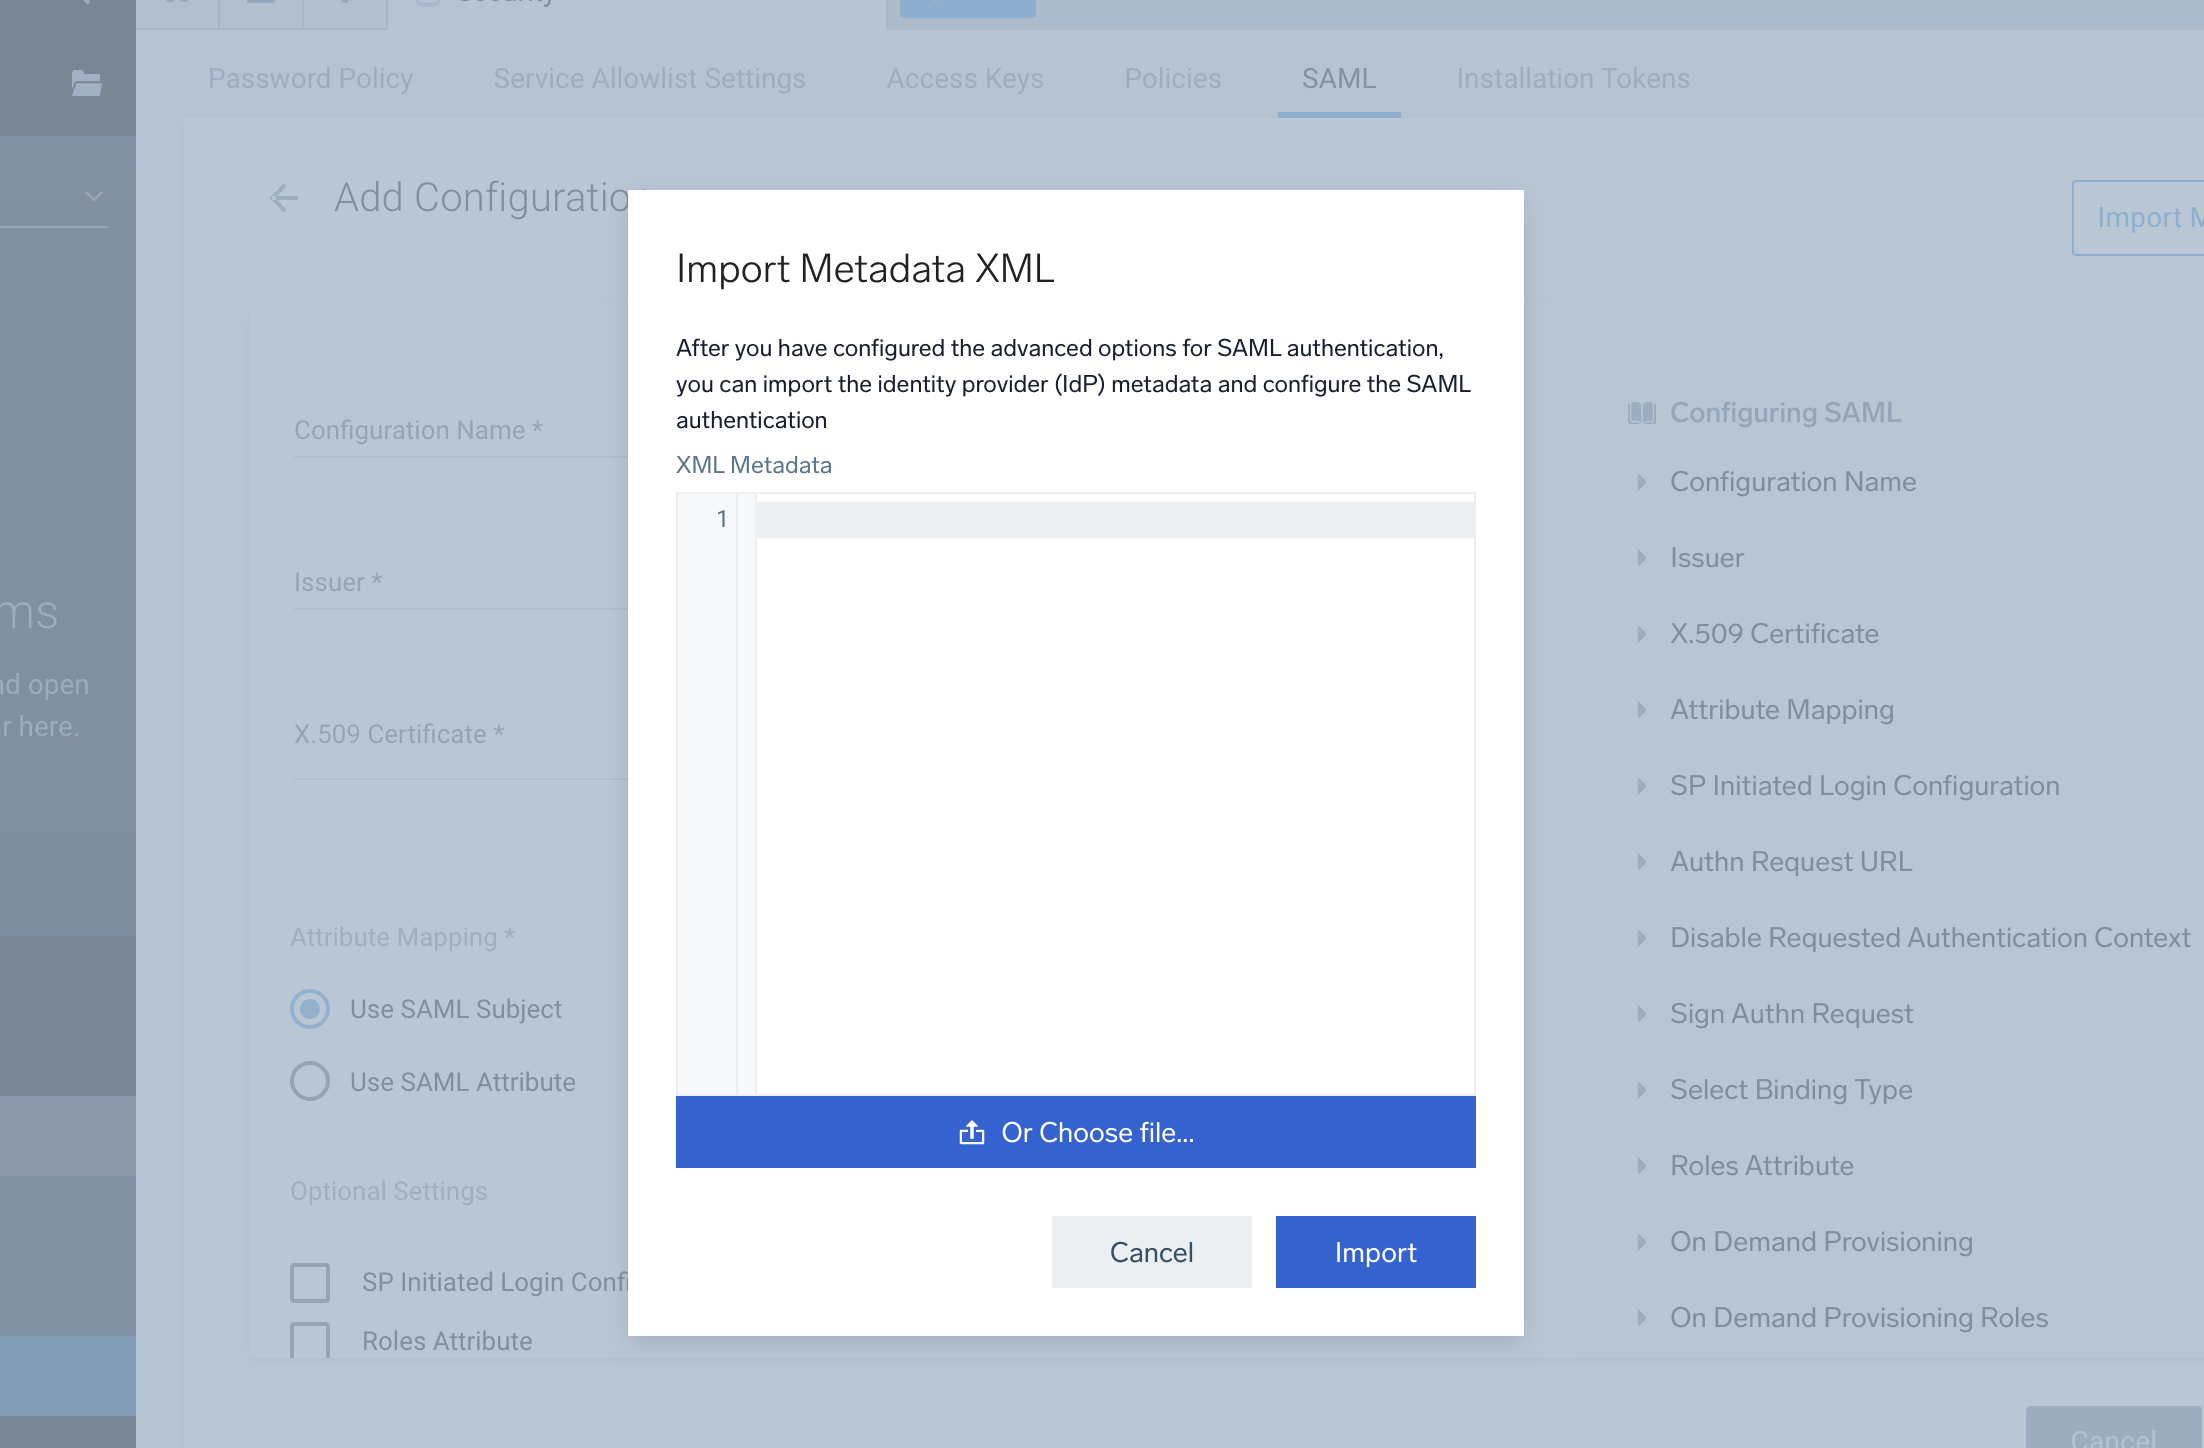
14 Click on Import.
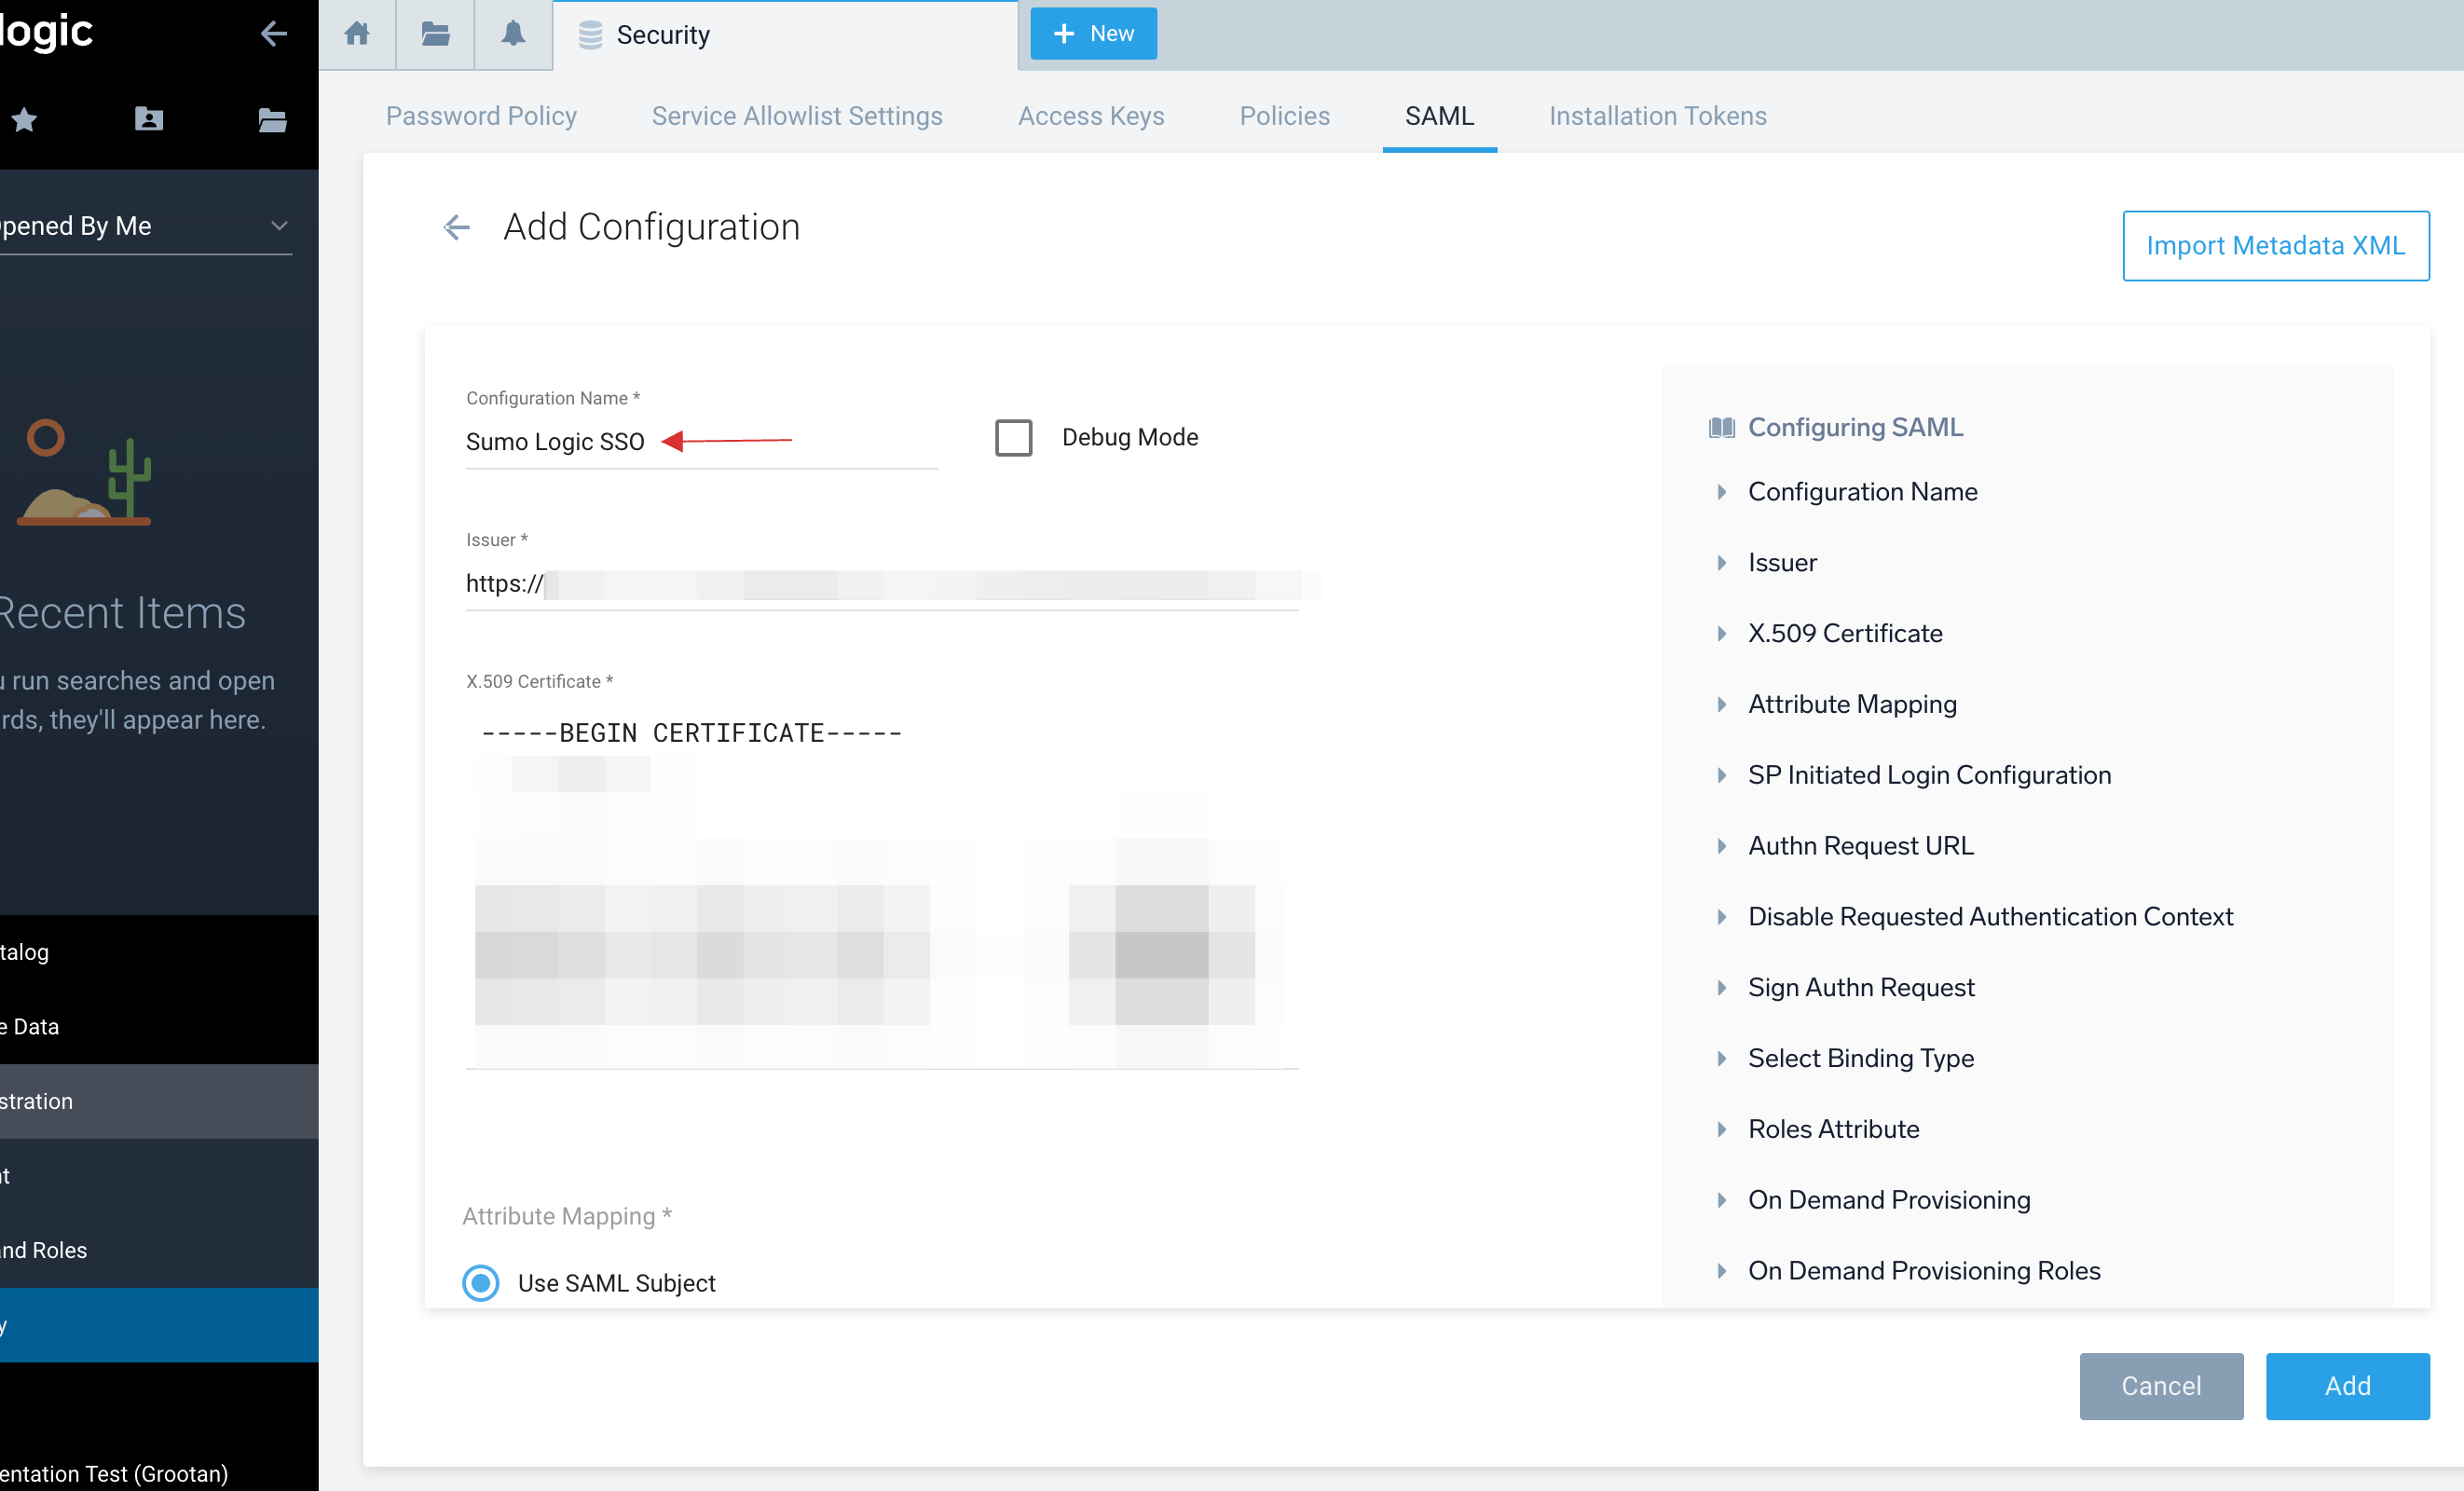
15 Provide the Configuration Name, and click on Add.
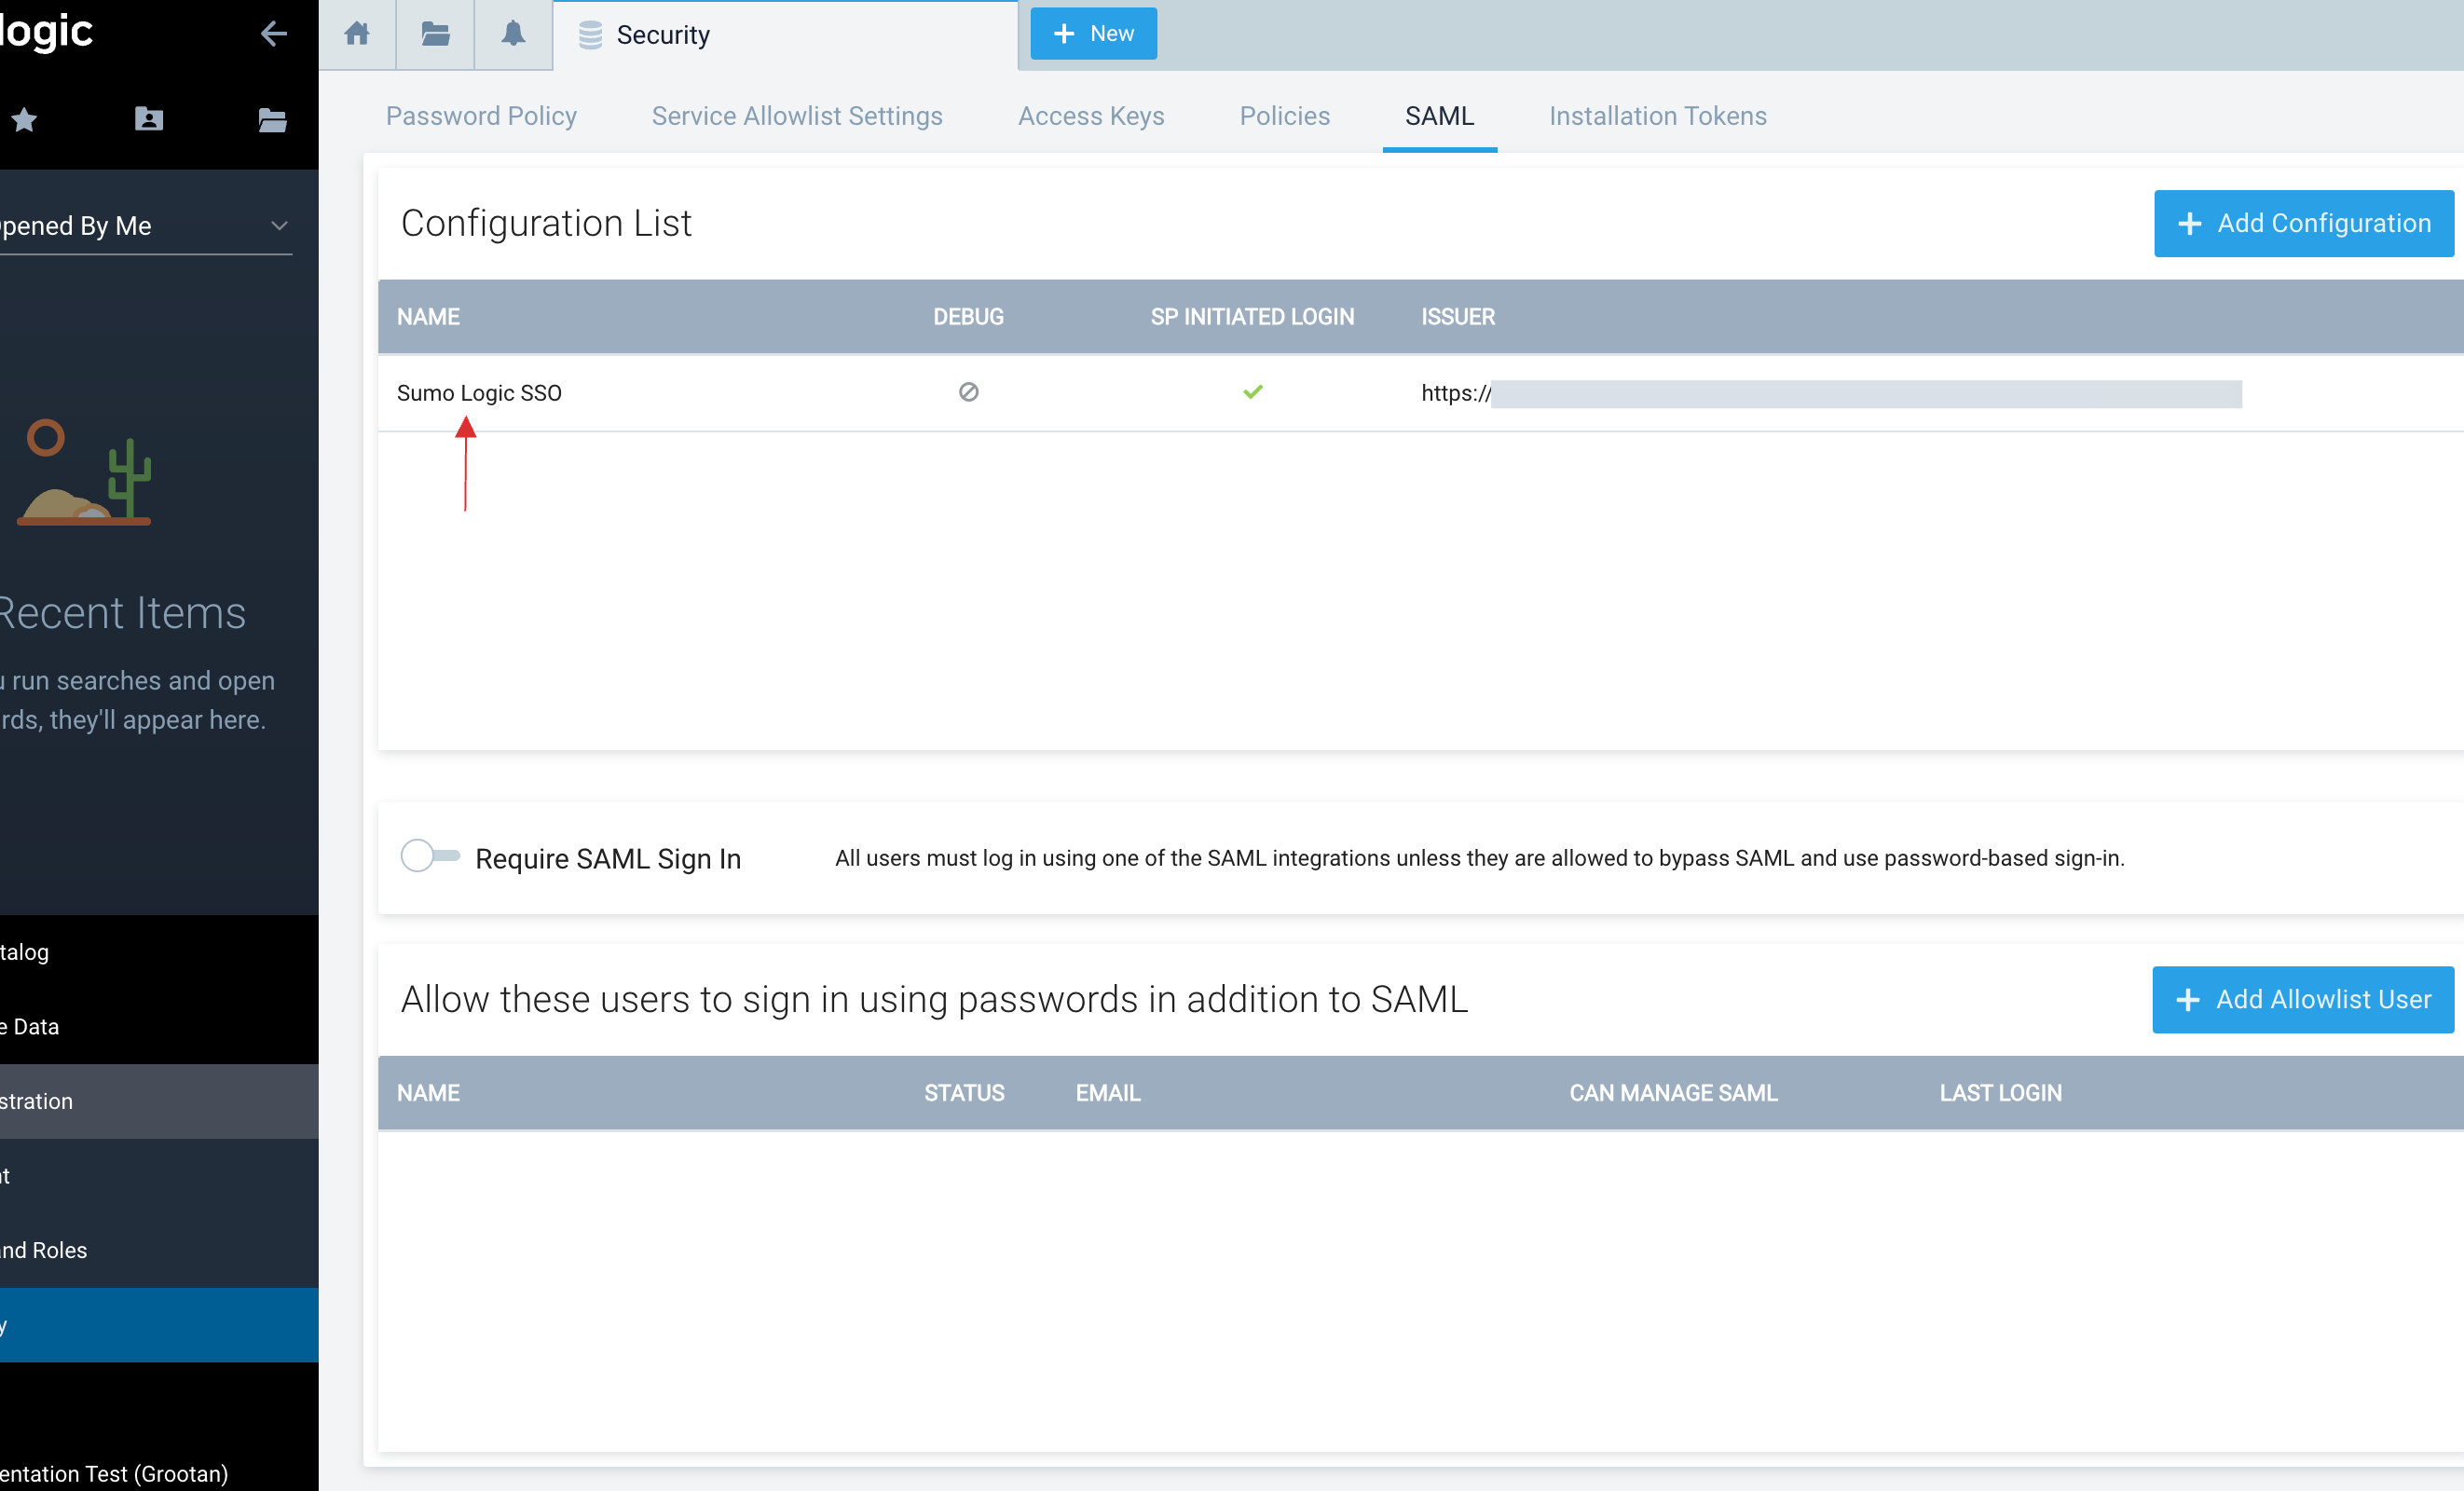
16 Click on the created configuration.
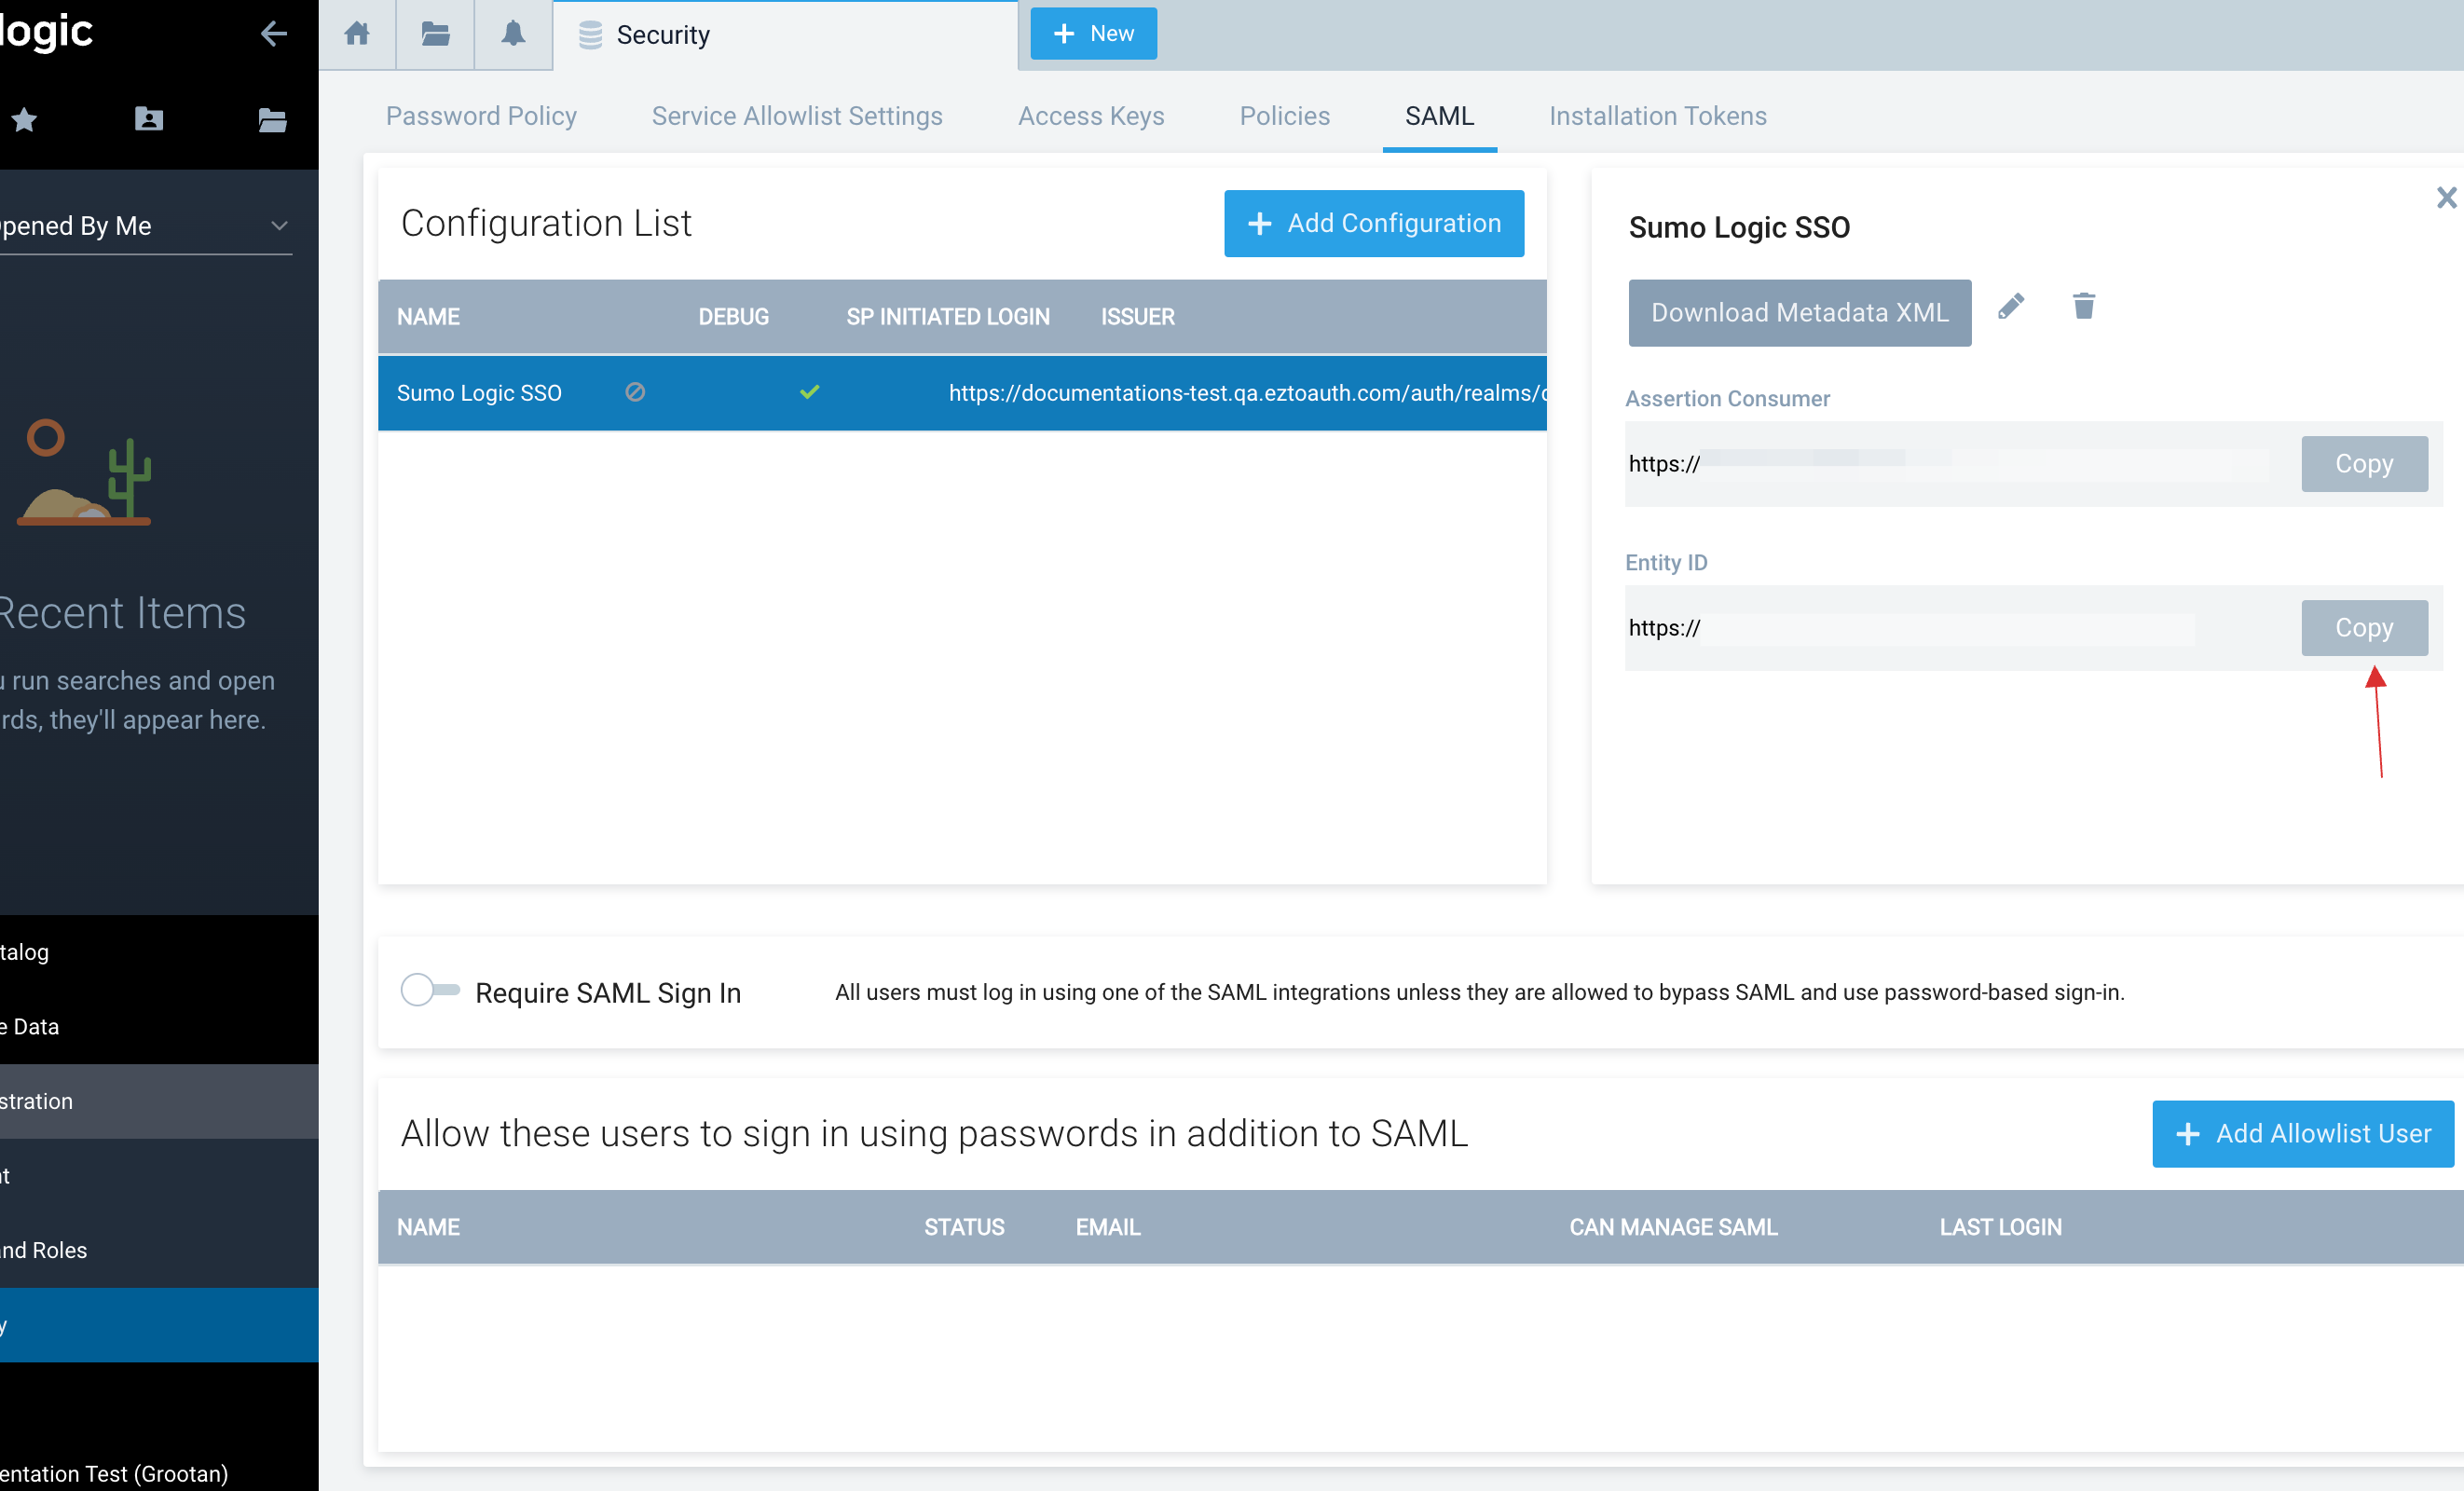
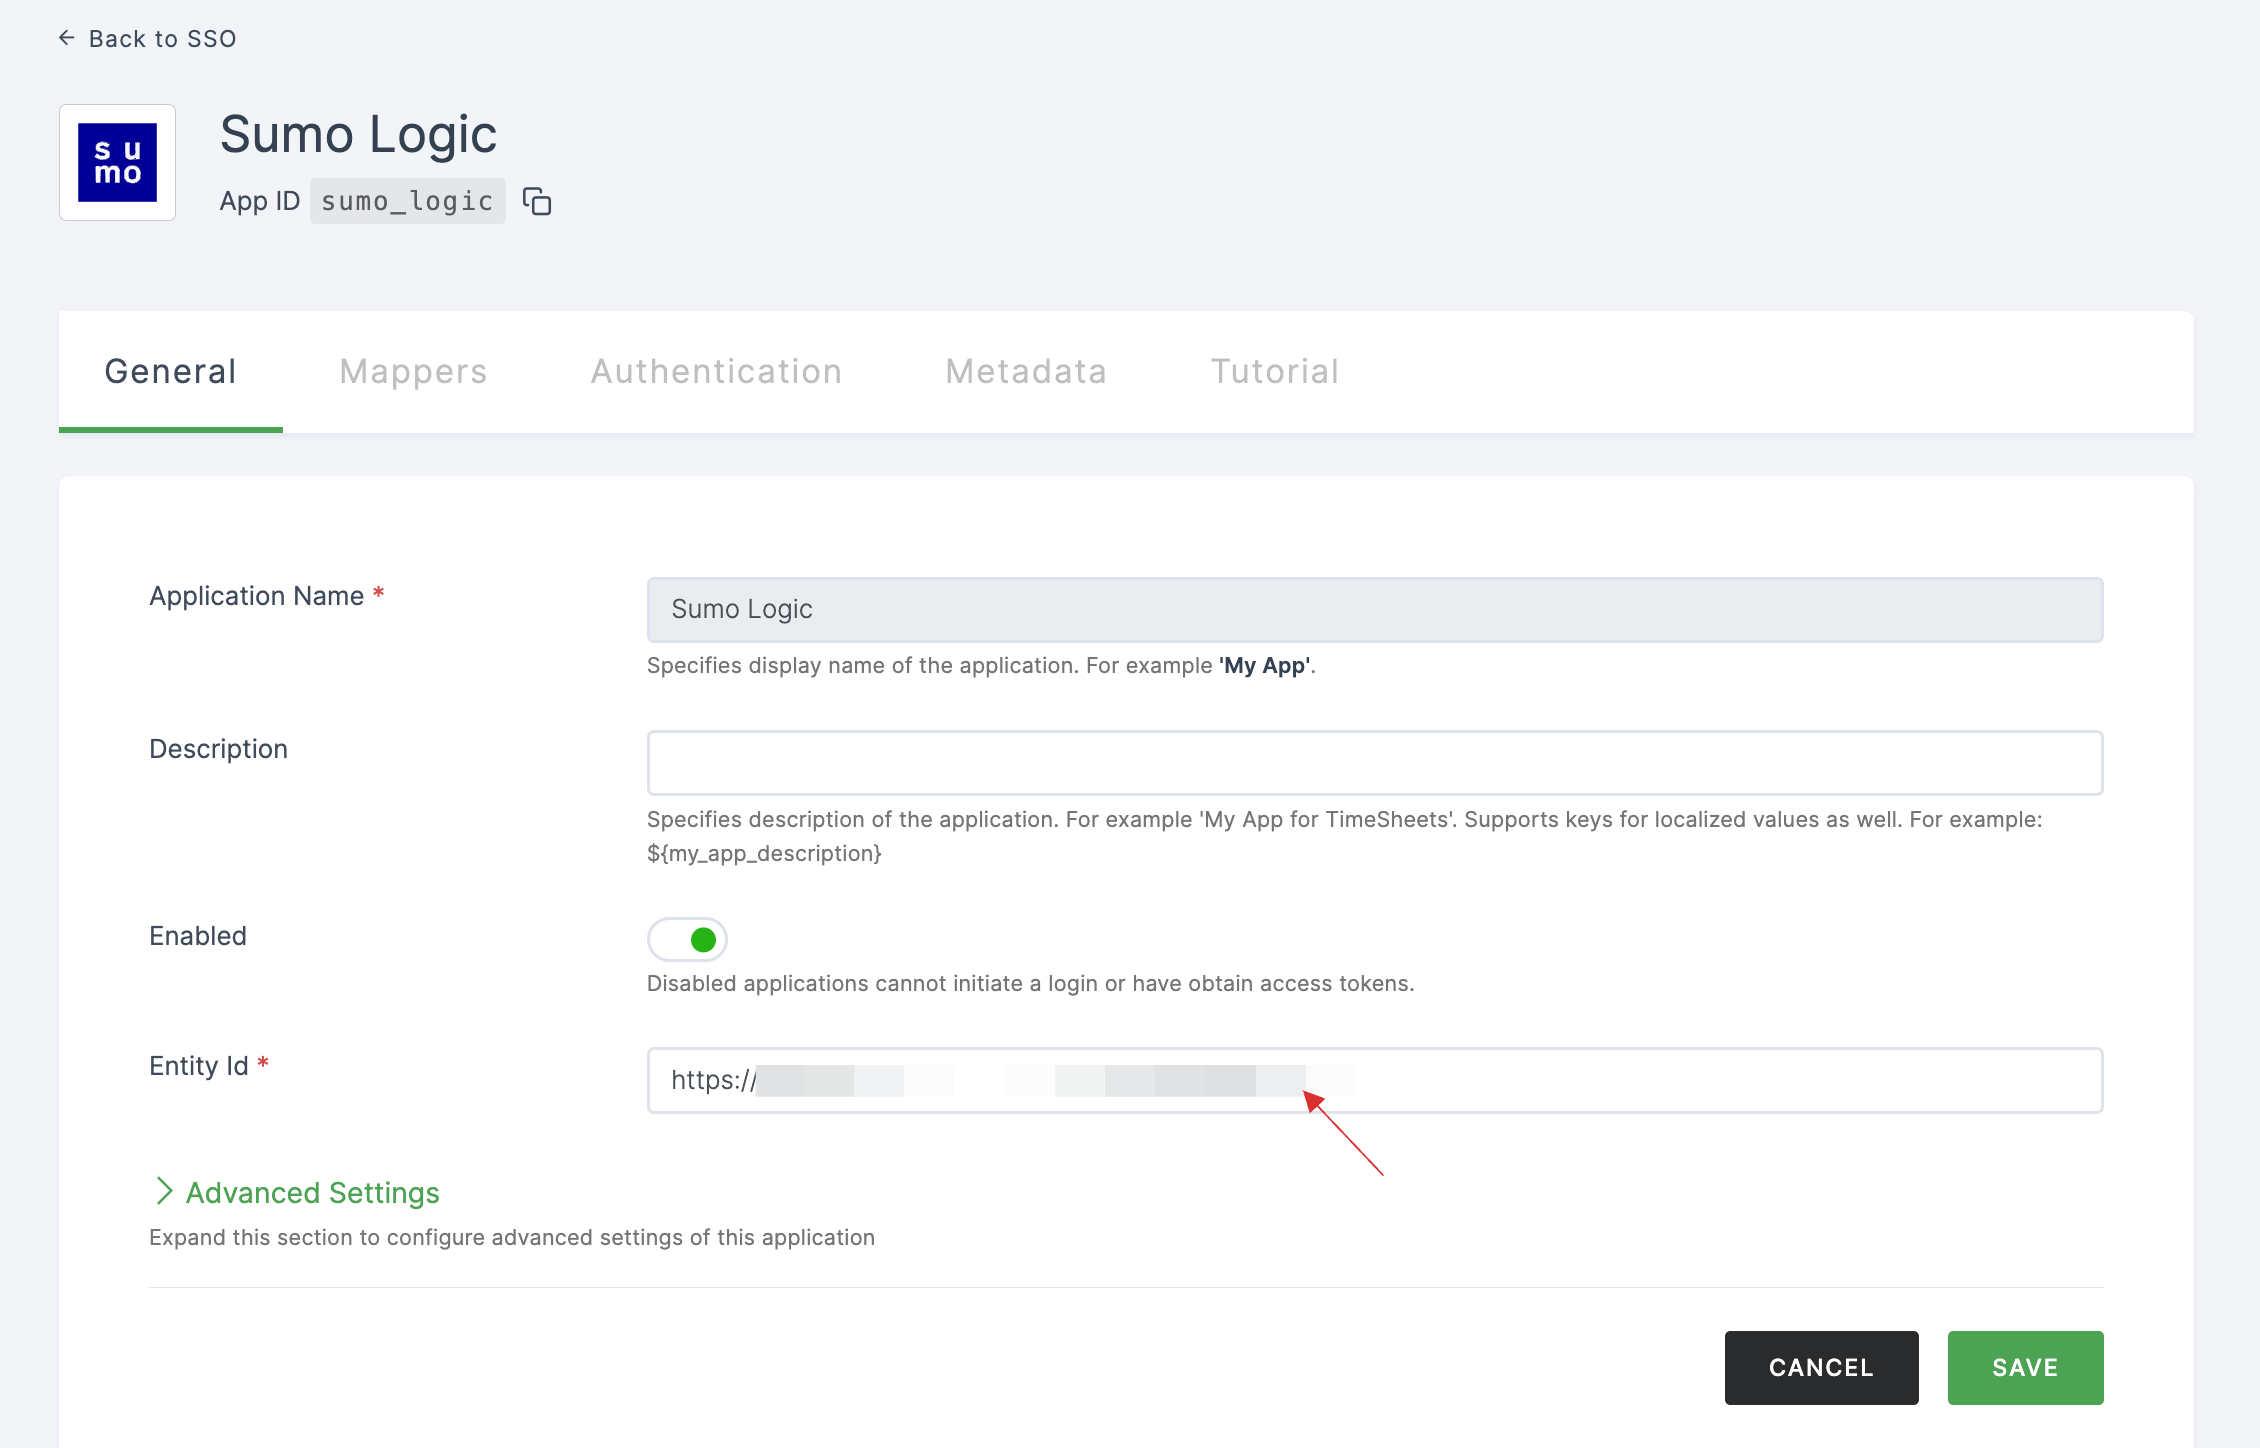
17 Copy Entity ID.
18 Return to your dashboard, go to Applications > SSO, and click on the created Sumo Logic SSO.
19 You will be directed to the SSO's General tab.
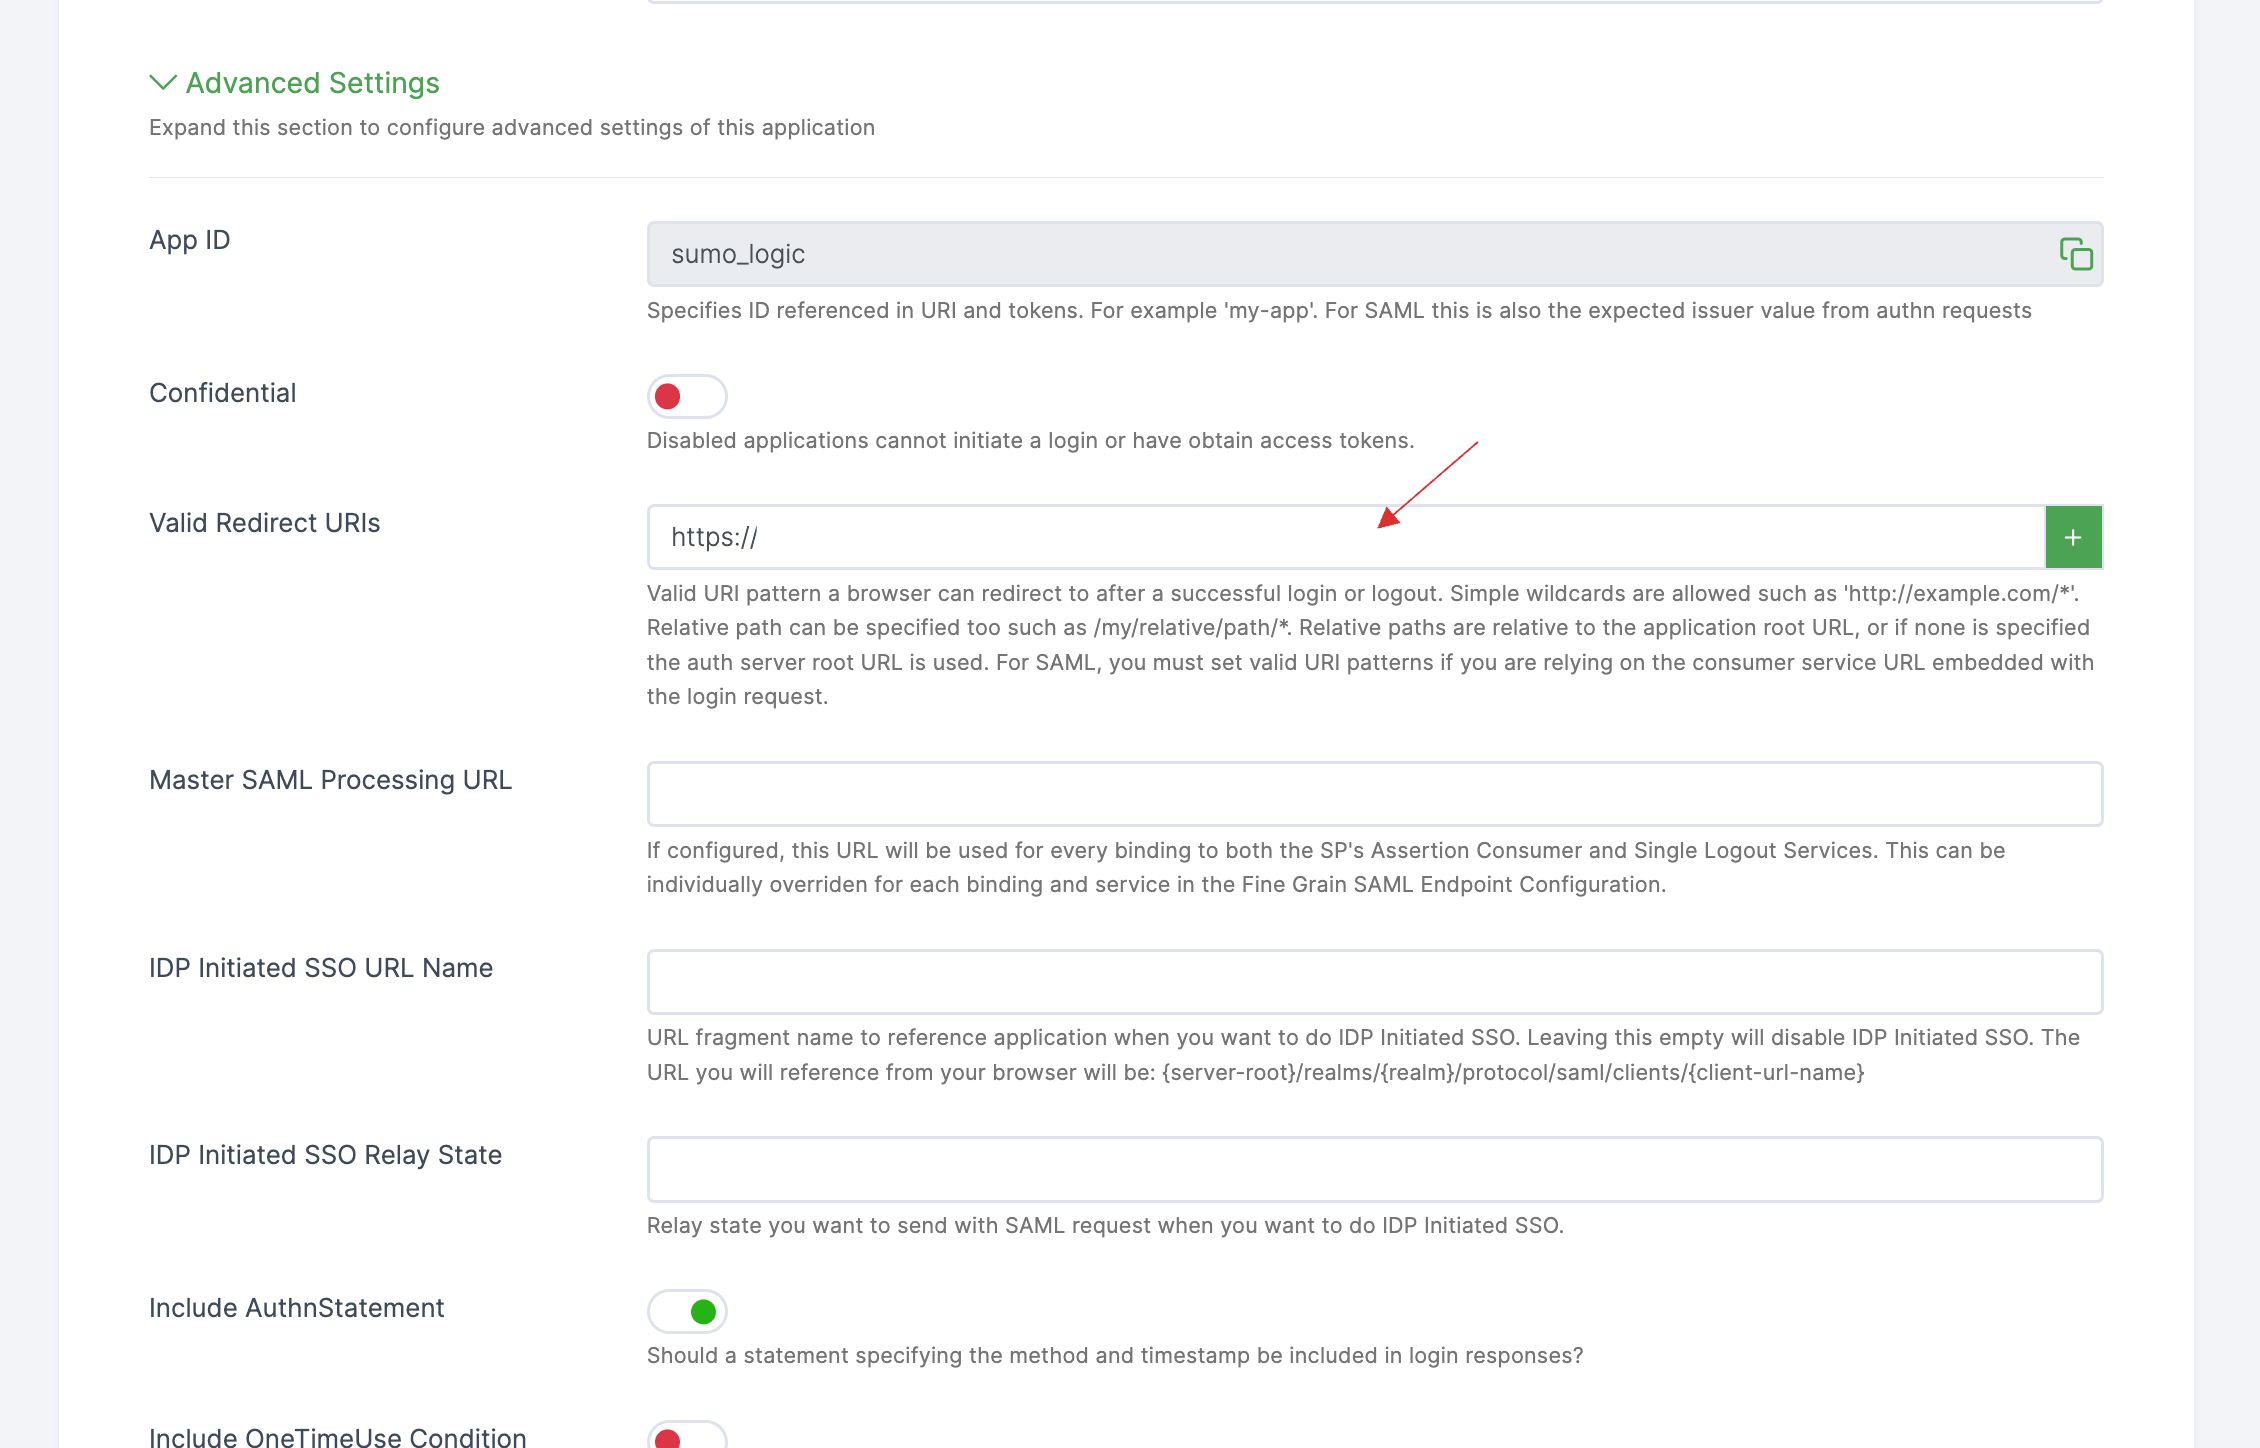
20 Scroll down, paste the copied Entity ID.
21 Switch to Sumo Logic, copy the Assertion Consumer.
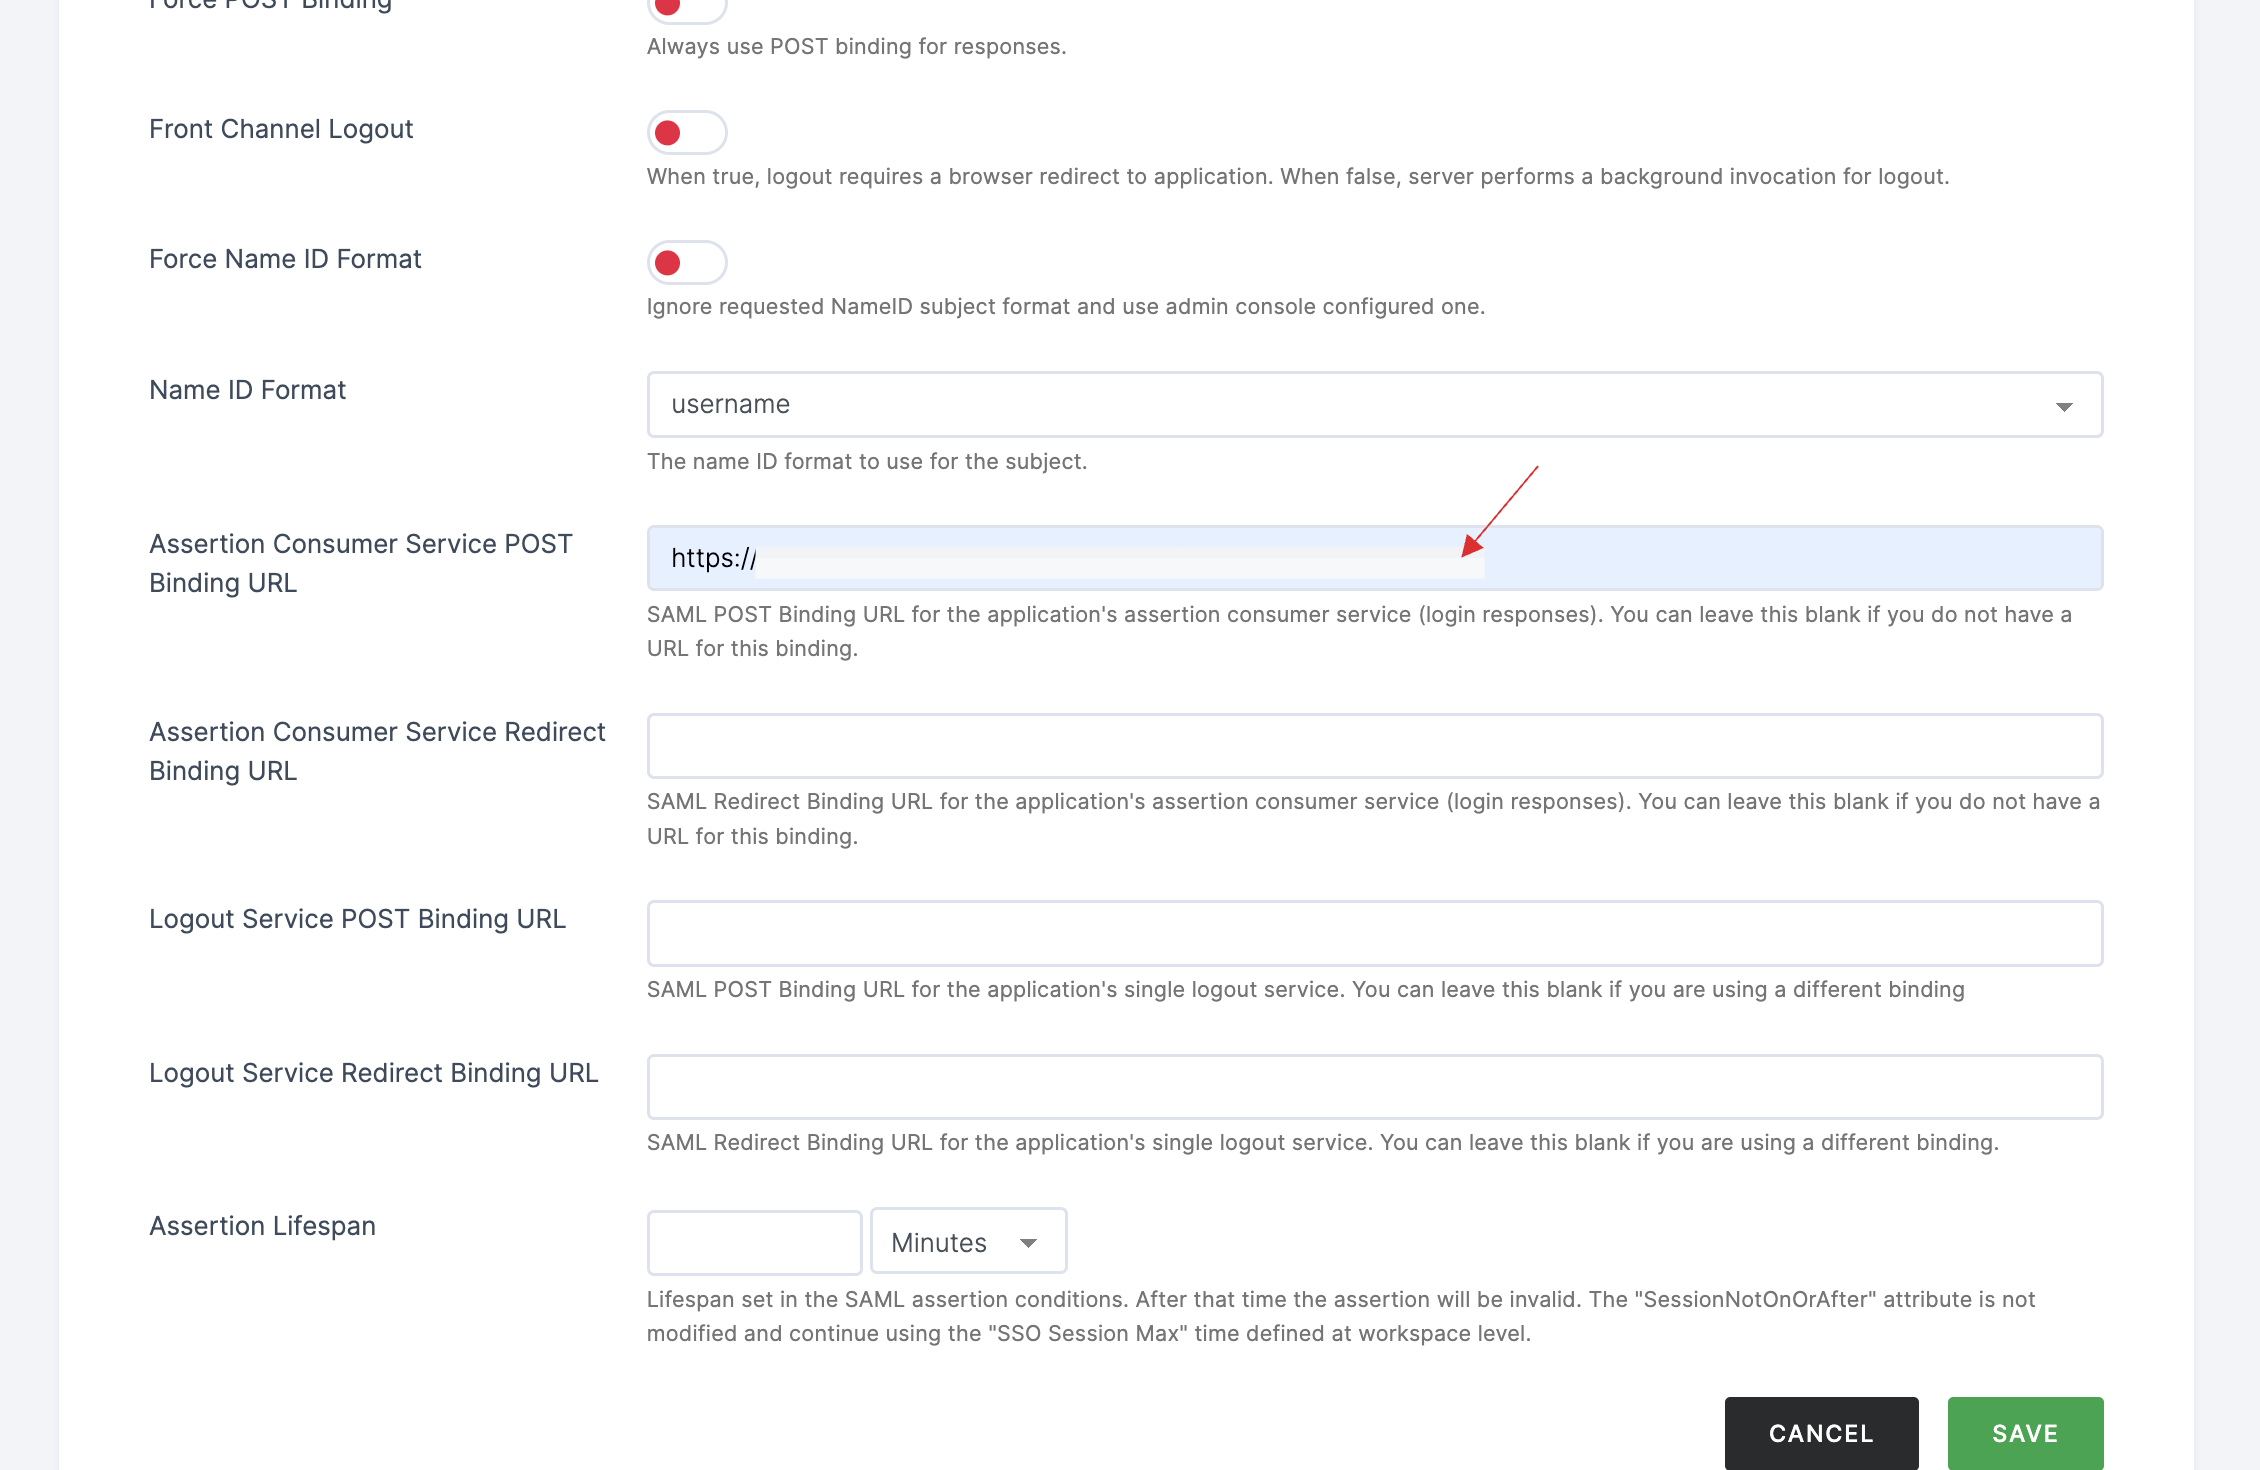
22 Return to your dashboard, sroll down, click on Advanced Settings.
23 Paste the copied Assertion Consumer in Valid Redirect URLs.
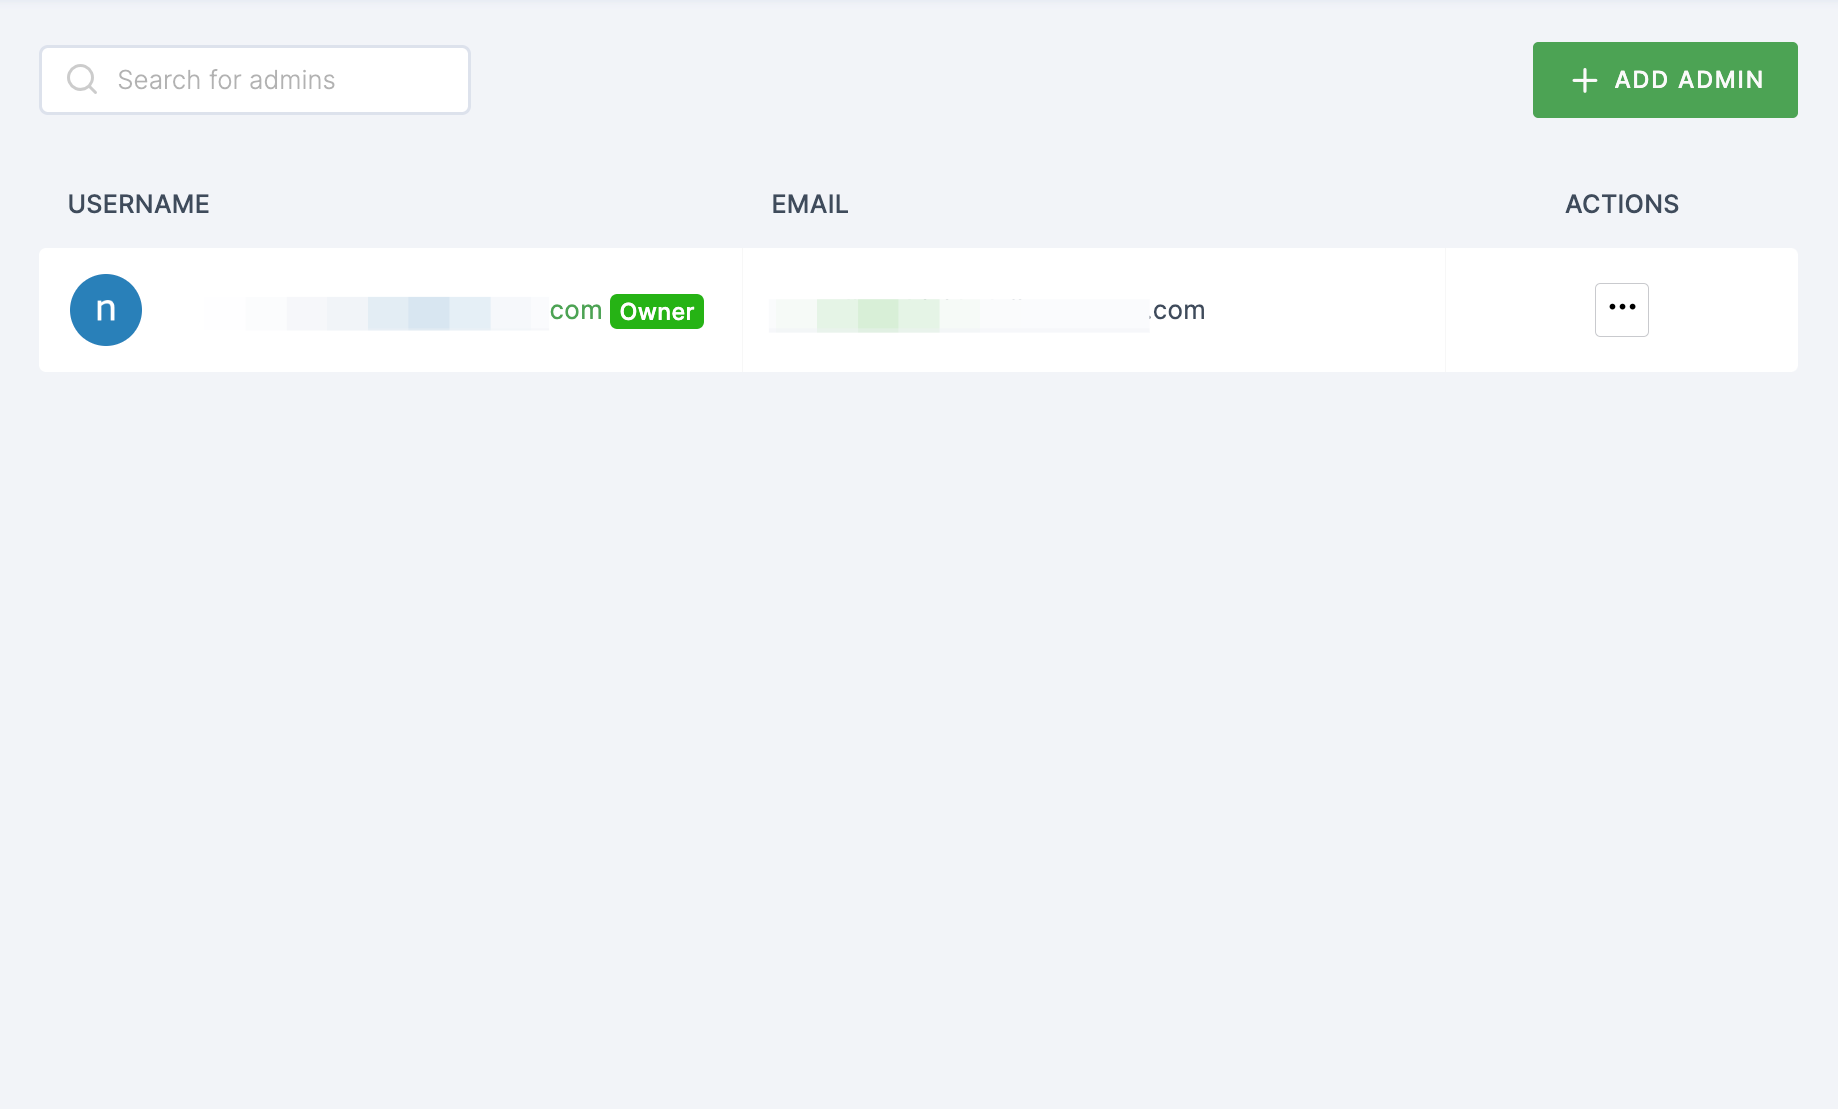
24 Paste the same in Assertion Consumer Service POST Binding URL field.
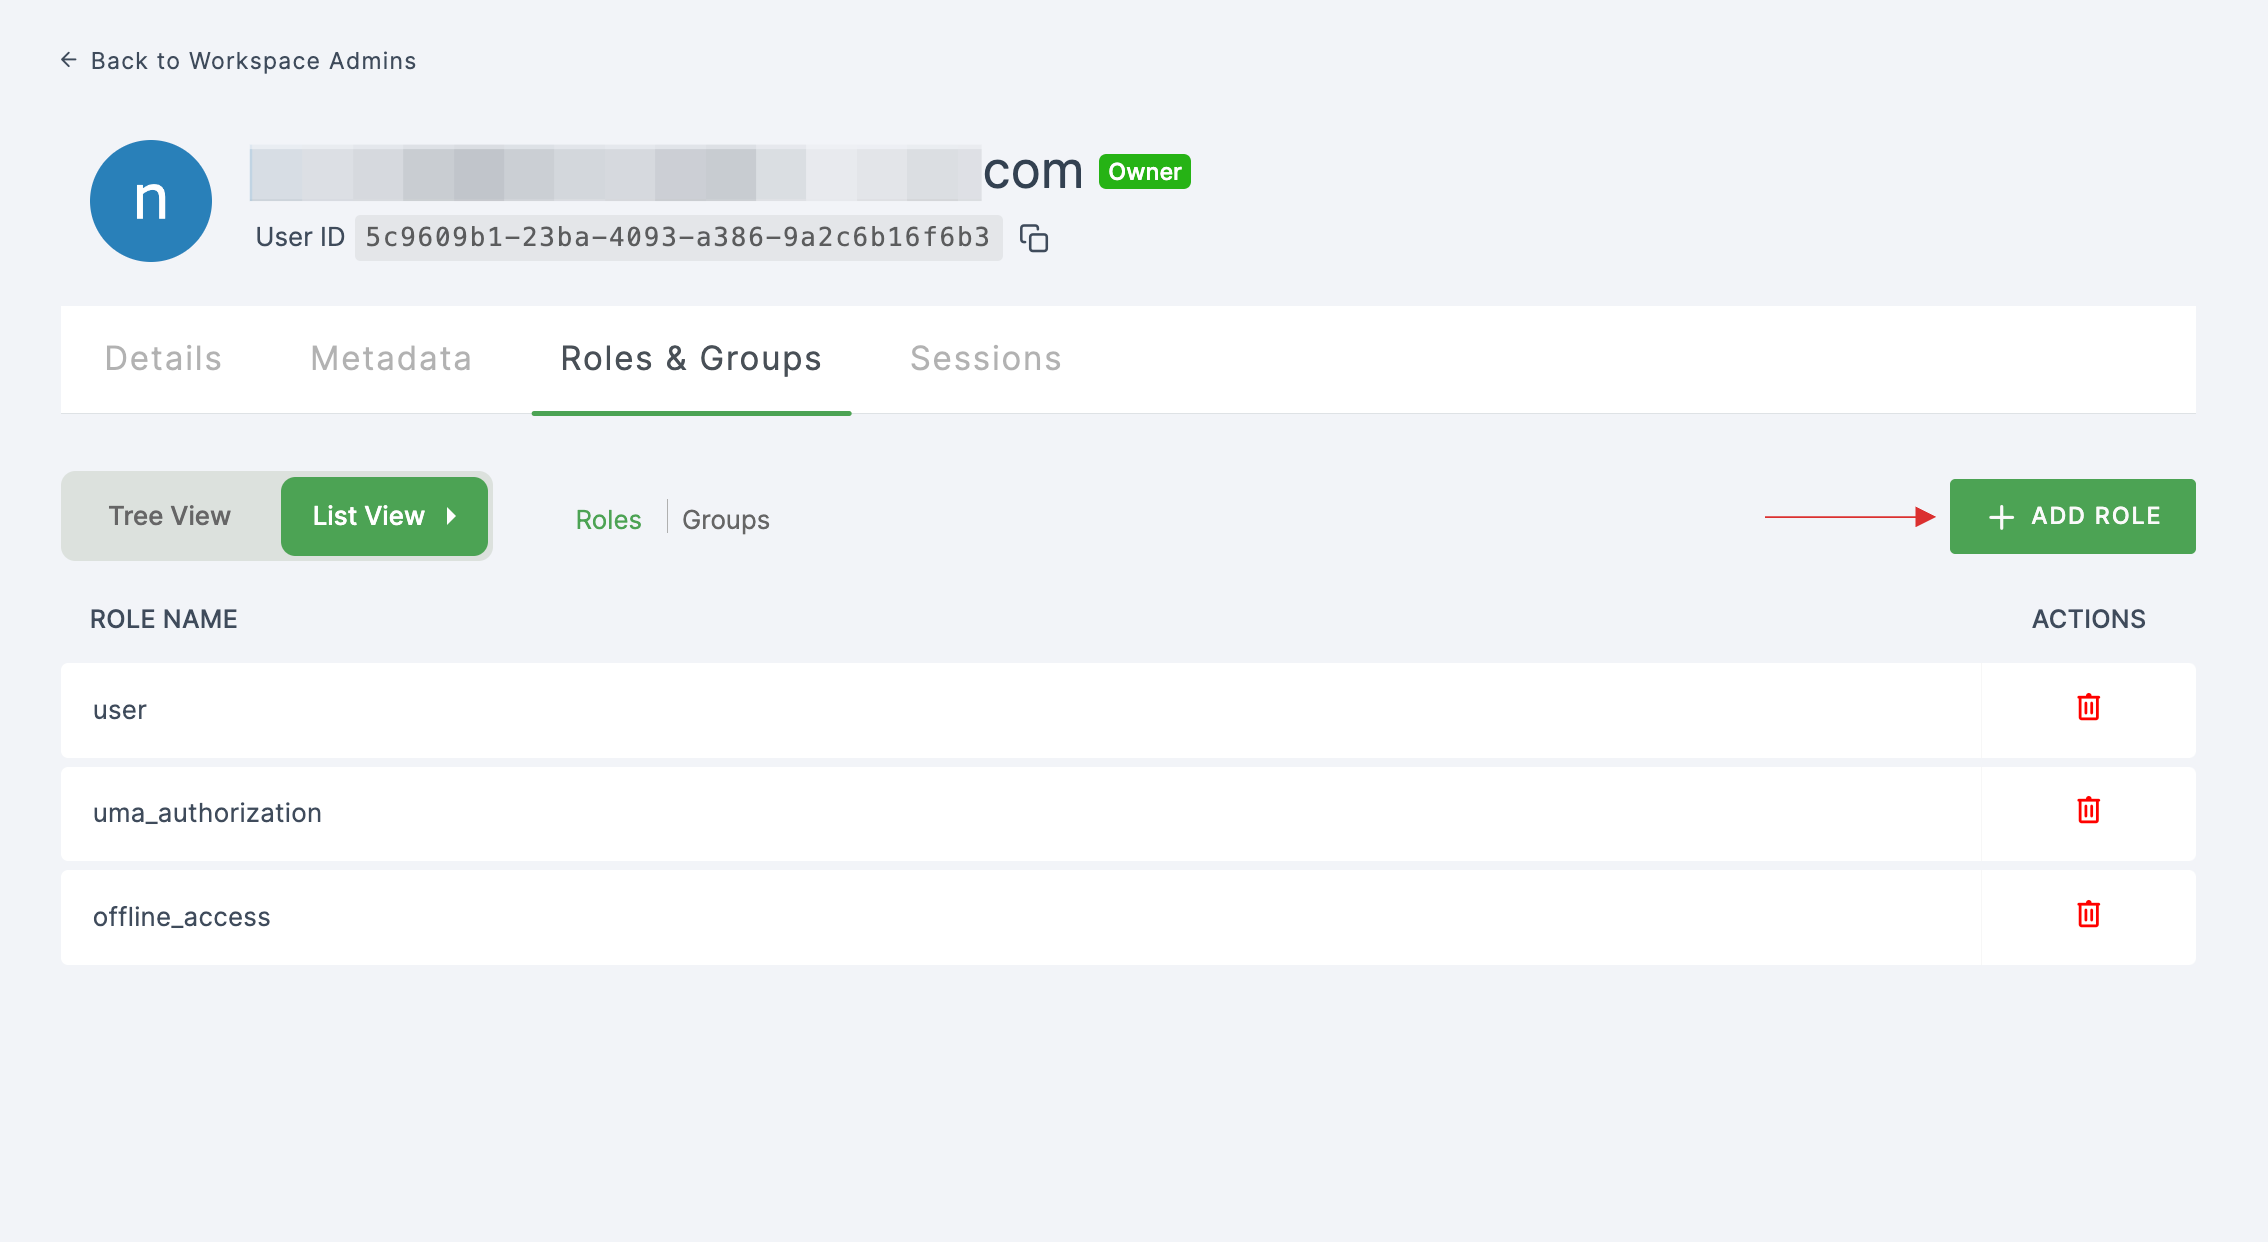
25 Click on SAVE.
26 Assign a user with Sumo Logic role. To do so, navigate to Users or Workspace Admins, click on the user you want to assign the role.
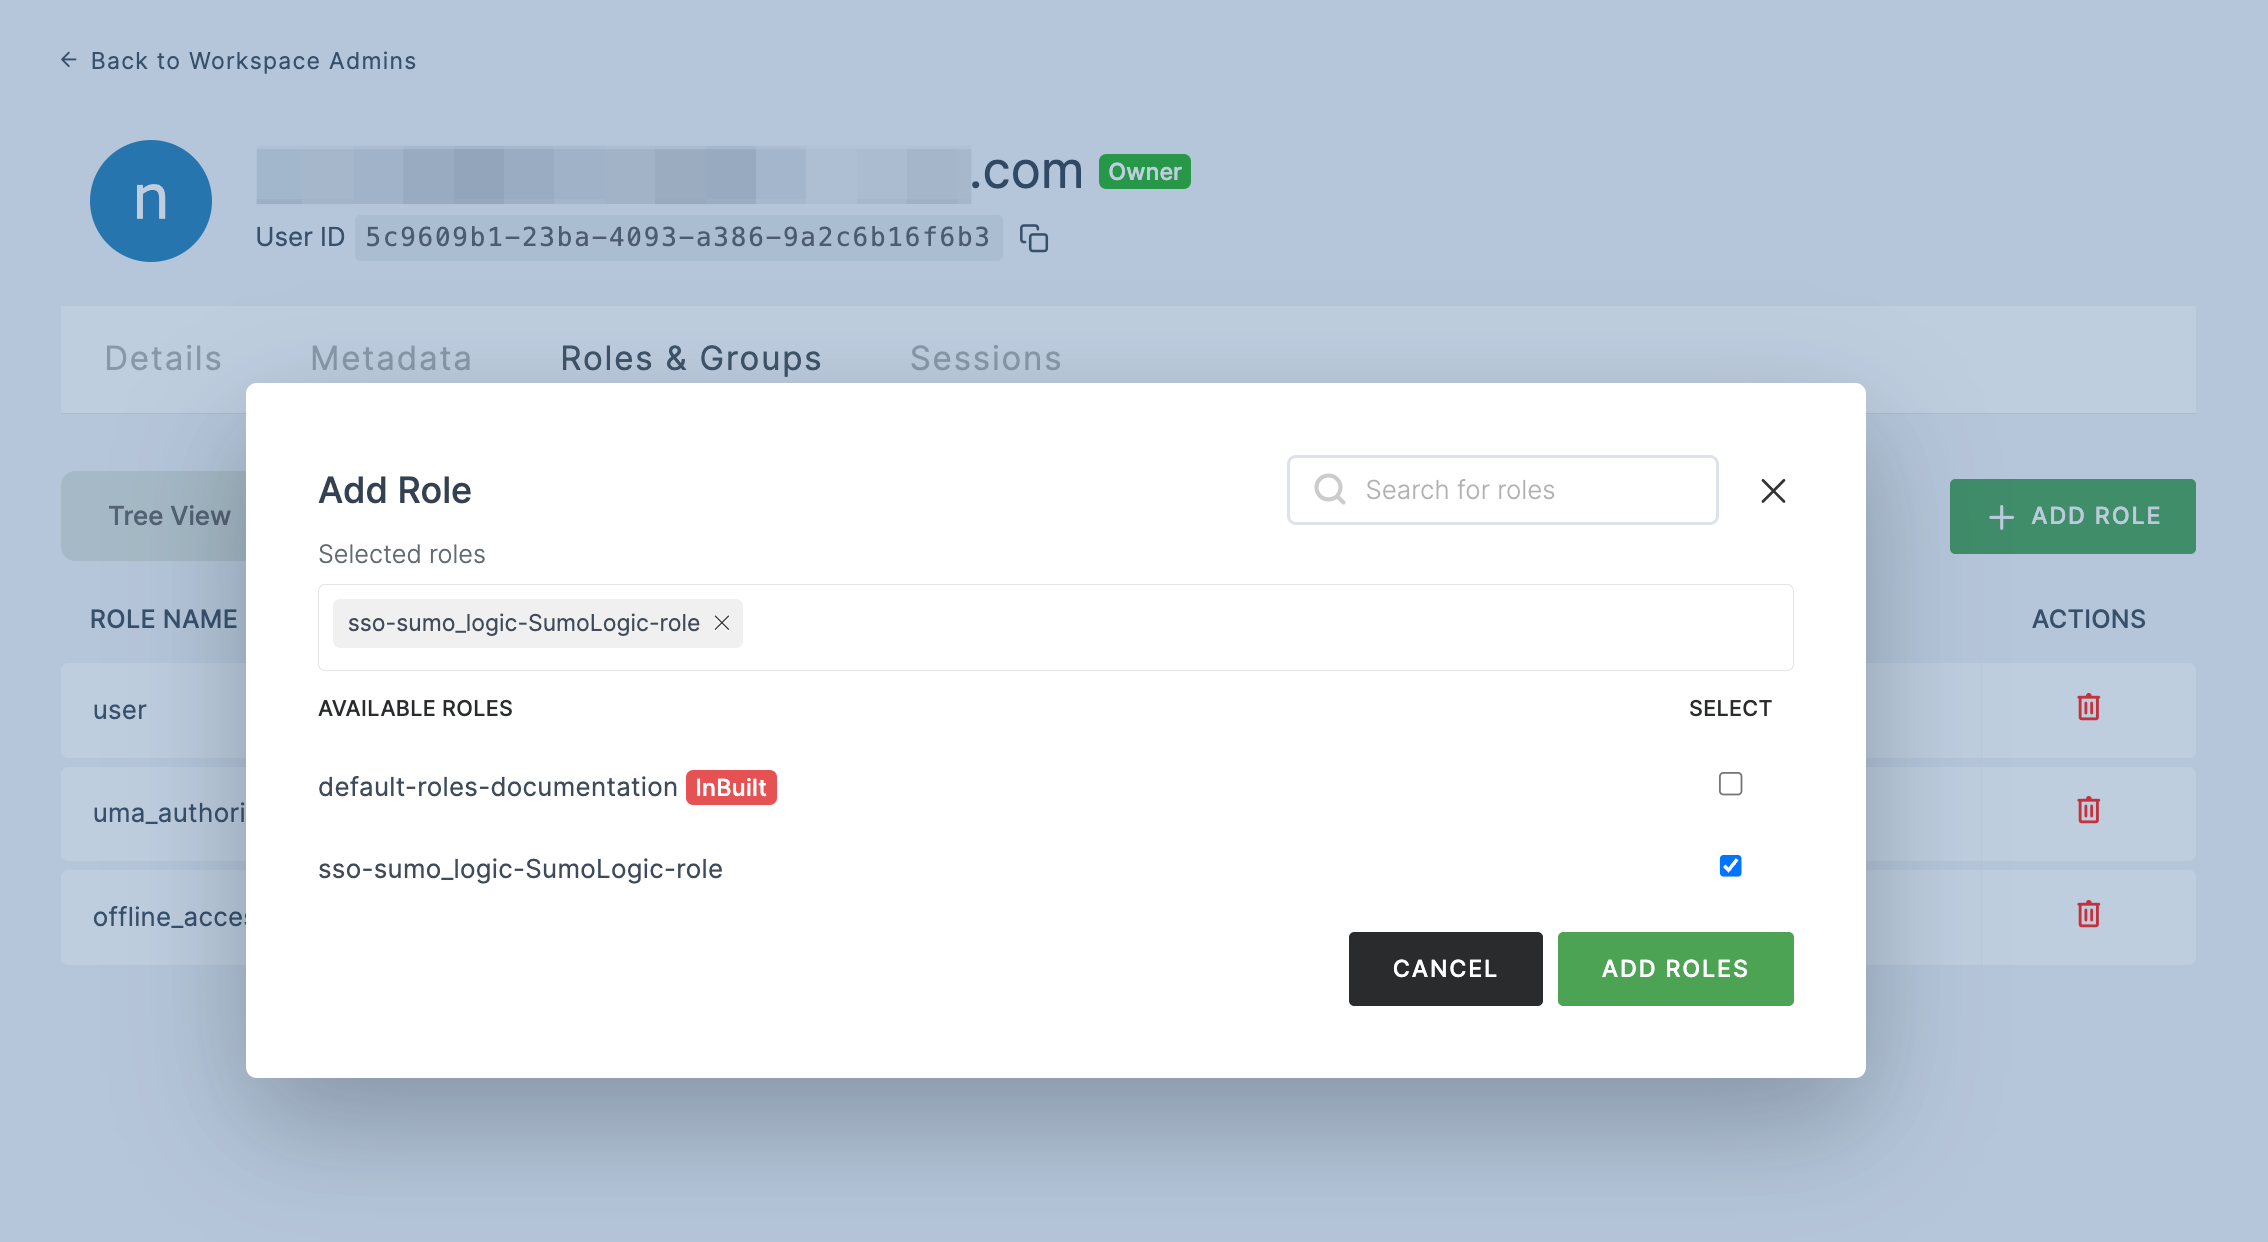
27 You will be taken to the user's Details tab, click on Roles & Groups.
28 Select List View and click on + ADD ROLE.
29 The available roles will appear; select sso-sumo-logic-Sumo-Logic-role and click on ADD ROLES.
30 To verify whether SSO has been successfully enabled, go to Applications > SSO, click on SSO DASHBOARD button.
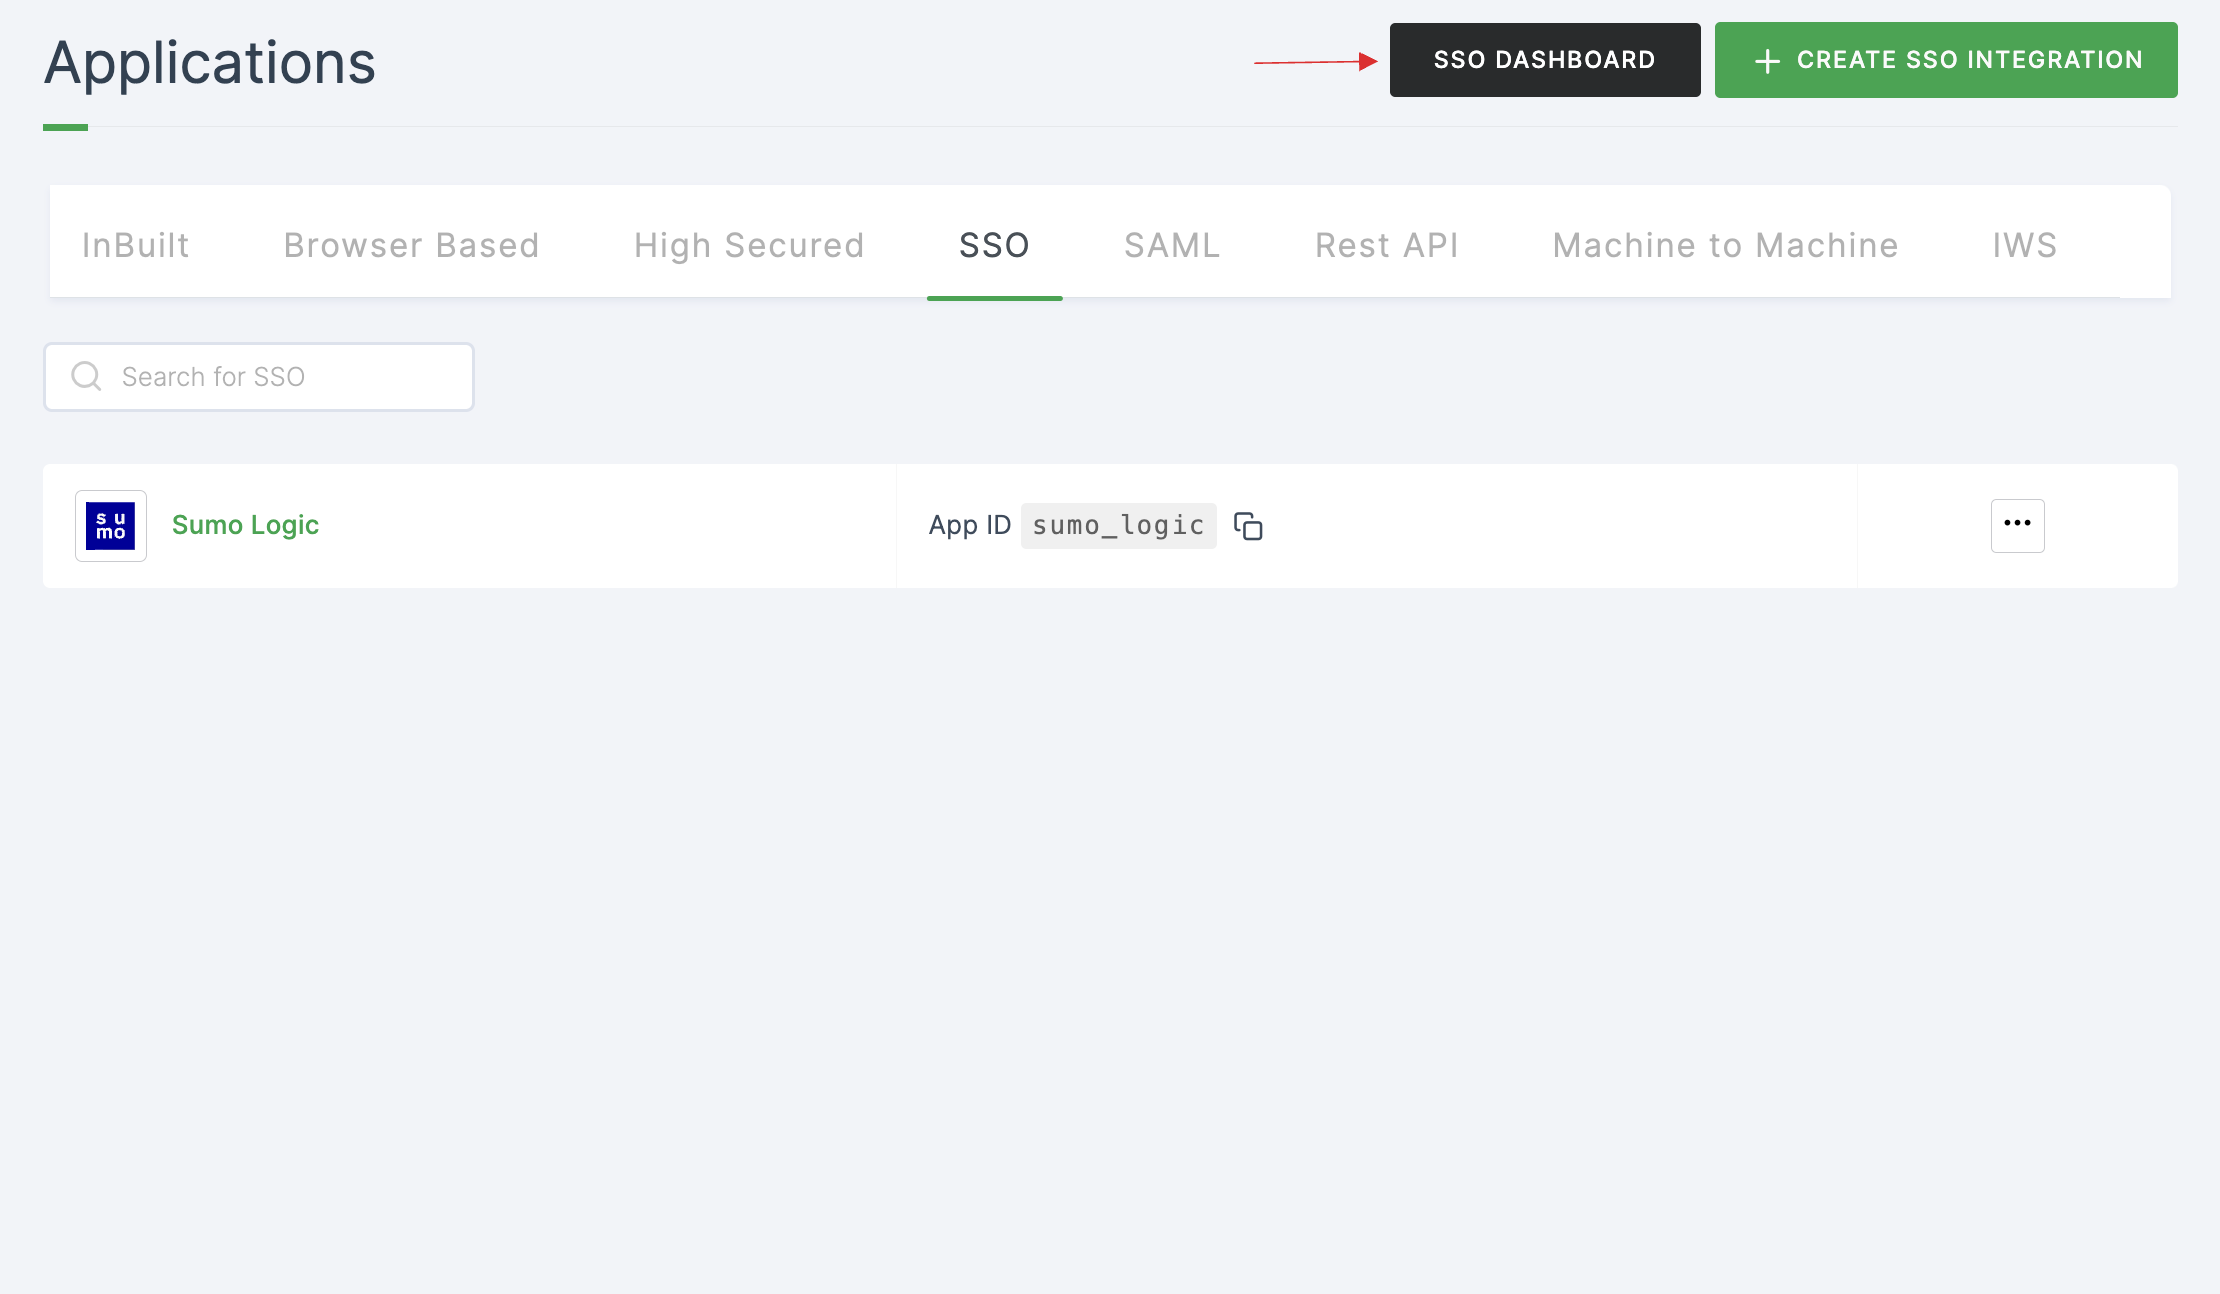
31 The Sumo Logic SSO will be enabled successfully.